As we know, social login serves as a common feature in modern apps and websites. Check out our article to understand the steps to implement social login integration into an app or website. But first, let’s move on to the definition and working principle before we get started.
What is a Social login?
Social login is a process that allows users to use an existing account from any creatable social media platform (such as Facebook, Google, Twitter, etc.) to log into another application or website without registering for a new one.
And it’s convenient and fast for users to log in with ease. On top of that, it helps the applications and websites easily collect basic information about the users.
How it works
The Social Login process is performed through OAuth — a protocol for access authorization. The app will require the user’s social account to access some information. After the user agrees, the social media platform will provide a token to the application that enables access to permitted information.
Social login configuration
To accomplish social login integration, firstly, we have to create account and configure on social platforms that we want to use for login on our app or website, in this article that are Google, Twitter, and Github. Then, we will set up a third party for login verification, such as Firebase.
Config Google for social login integration
- Go to https://console.cloud.google.com/ and log in with your Google account.
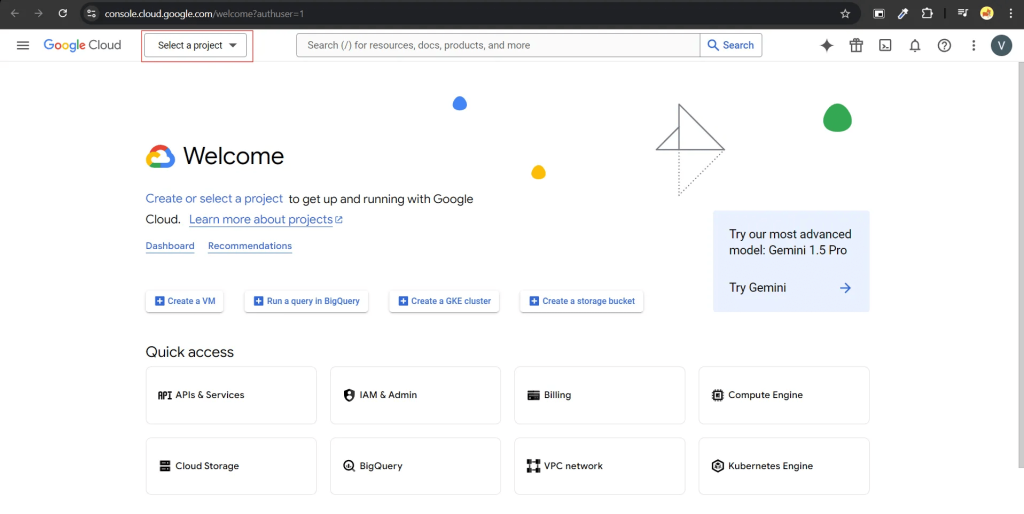
- After logging in, the interface will display as in the picture below. Click Select a project.
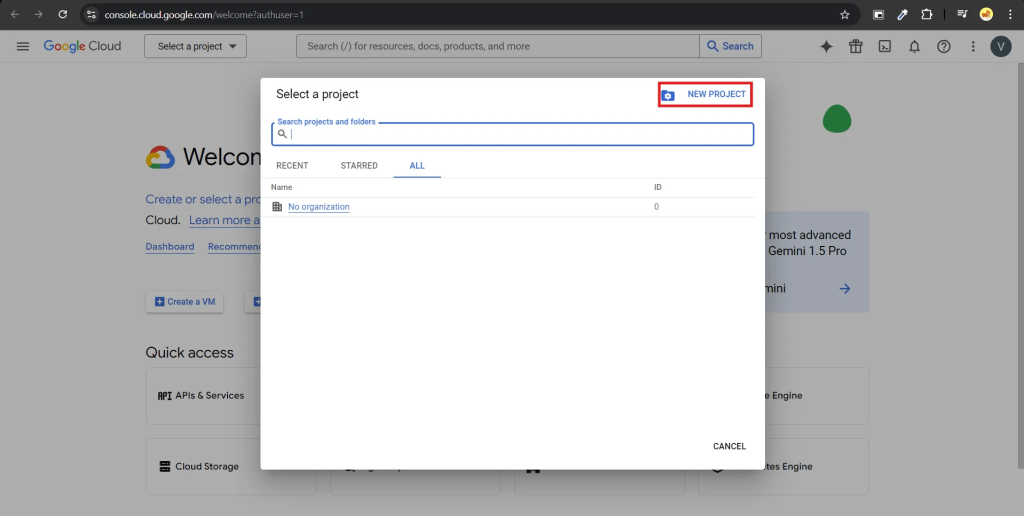
- Click NEW PROJECT
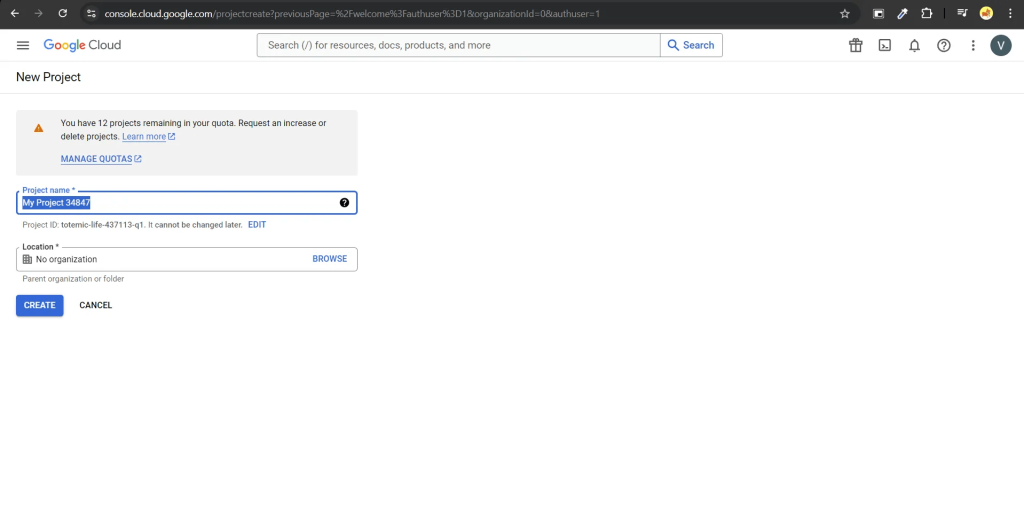
- Fill in the information in the Project name. Users will see this name when they continue to log in. Note that this name cannot be changed once it is set. The Location section can be set as default. When you are done, click “Create”.
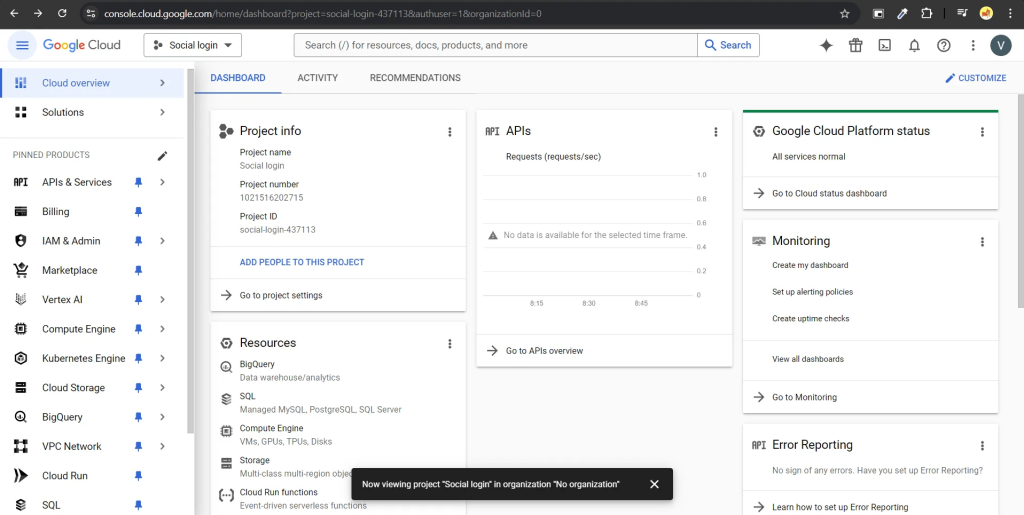
- Once you create a project successfully, the interface will be shown below. Click APIs & Services, and choose Credentials.
- Next, we need the Client ID configuration. This helps Google identify and verify your application, allowing it to authenticate and grant access to Google account information. However, you first need to configure the OAuth consent screen. This is a display screen when users grant the application access to their protected information, such as their Google account details. Click CONFIGURE CONSENT SCREEN on the right corner of the screen.
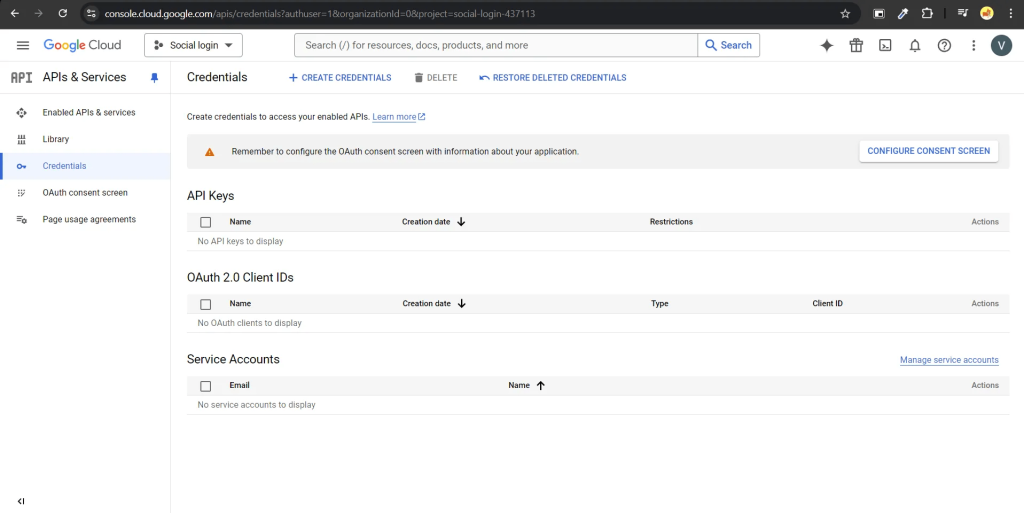
- External→ allows all users with a Google account to use it.
Internal→ only allows users with a Google account within the same organization as you. In this case, we choose External.
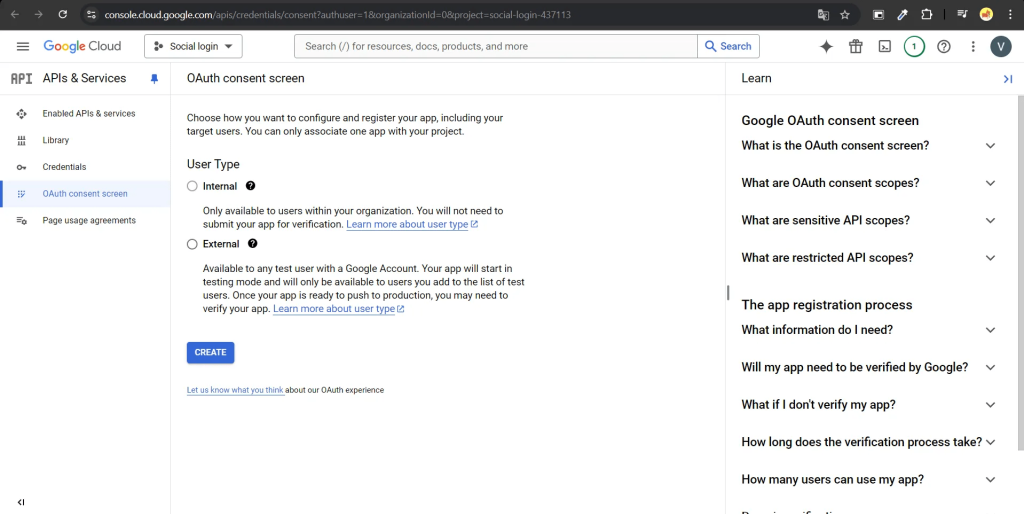
- Fill in the information, the fields marked with (*) are mandatory information that must be entered. Choose SAVE AND CONTINUE
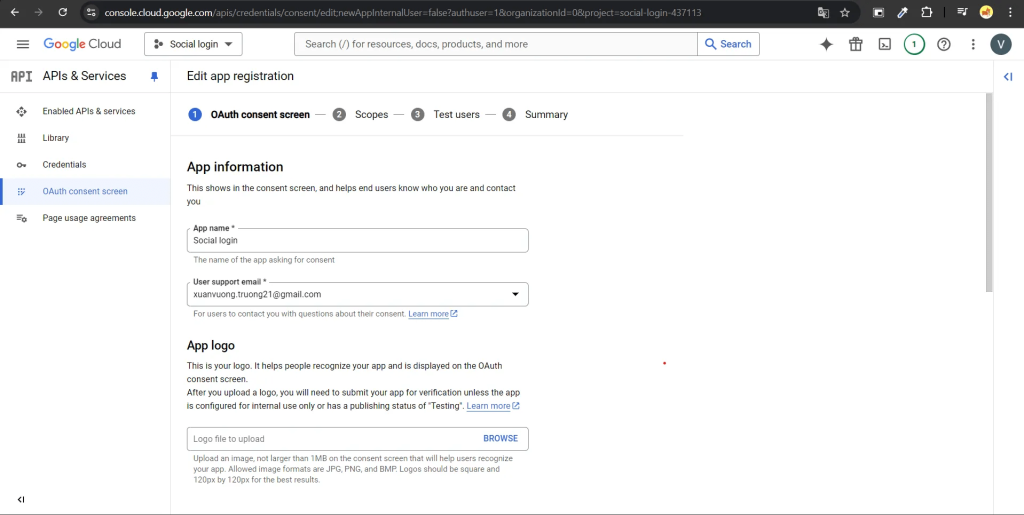
- In the Scopes tab, you will configure the details that your application will request from users. Next, click SAVE AND CONTINUE and choose BACK TO DASHBOARD
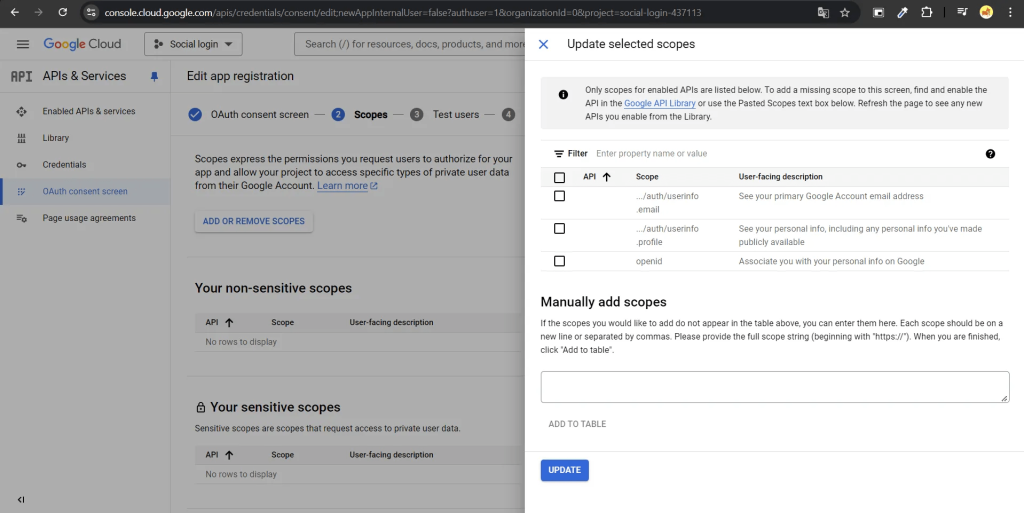
- After configuring the OAuth consent screen, move back to the Credentials tab and choose CREATE CREDENTIALS → OAuth client id. Select “Web application” in the “Application type” field.
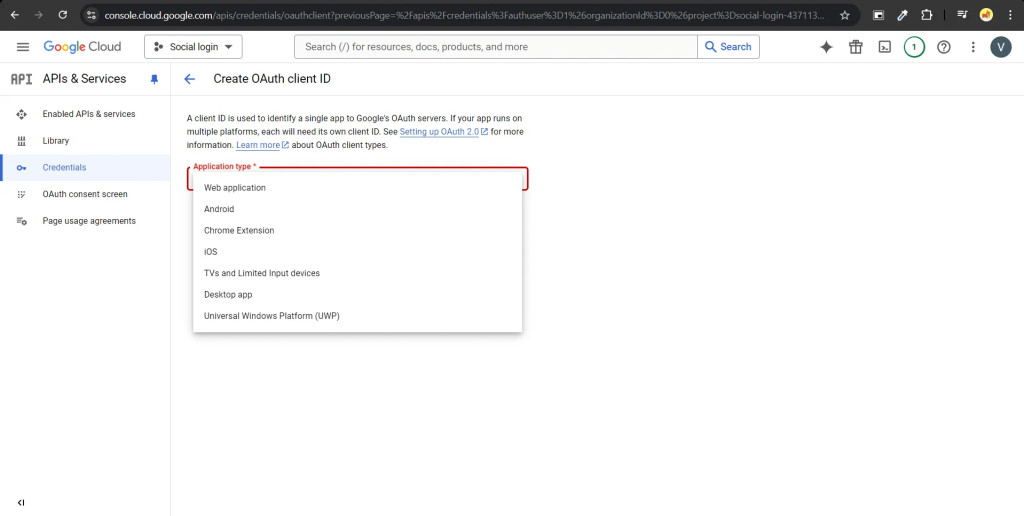
- Authorized JavaScript origins: This is the host address of your website.
Authorized redirect URIs: This is the URL to which users will be redirected after successful authentication. After filling in all the information as shown in the image, select CREATE.
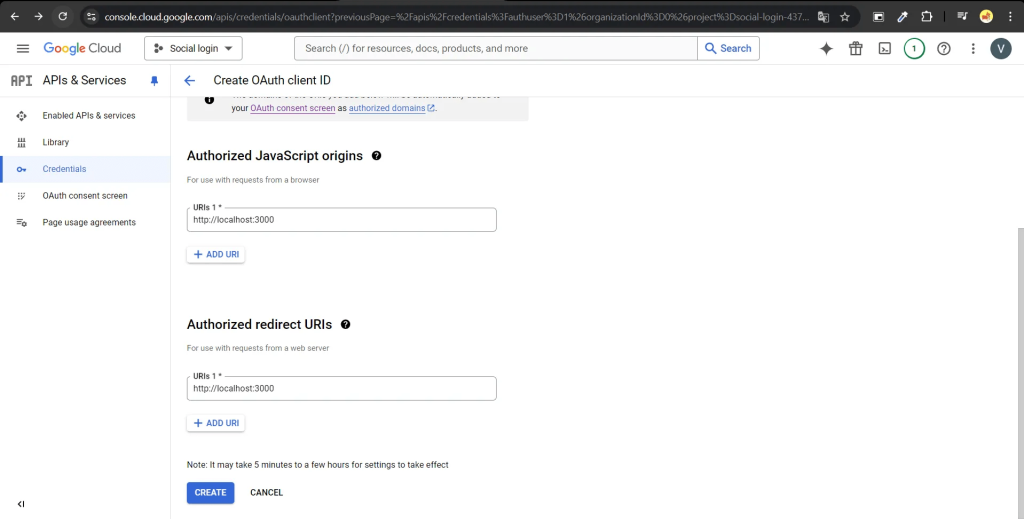
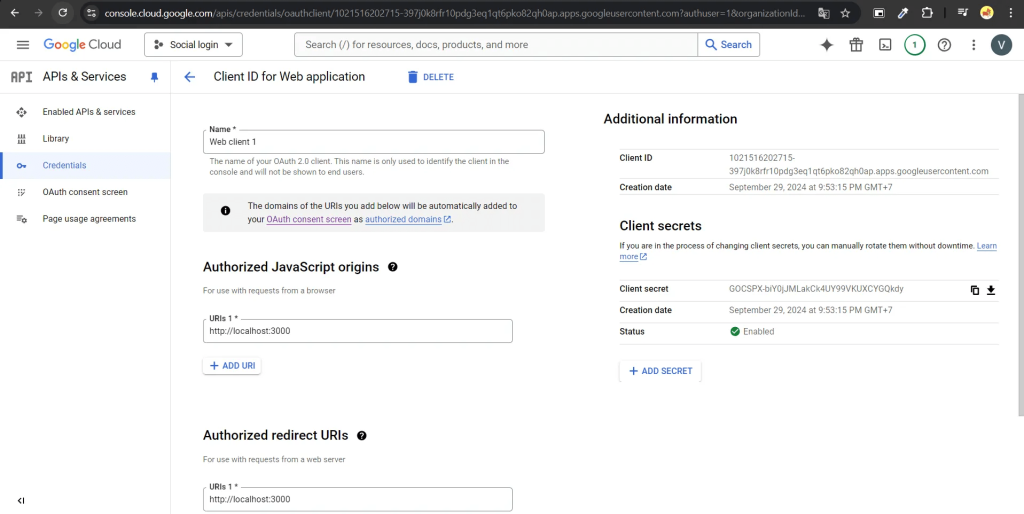
- After the Client ID has been created successfully, copy the Client ID and Client secret into .env file
VITE_GOOGLE_LOGIN_CLIENT_ID=Client ID VITE_GOOGLE_LOGIN_CLIENT_SECRET=Client secret
Social login integration with Twitter
- Go to https://developer.x.com/en and register a developer account. The registration process is similar to creating a regular Twitter account.
- Once the registration is successful, the interface will display as shown below. By default, one application (app) will be created automatically for you.
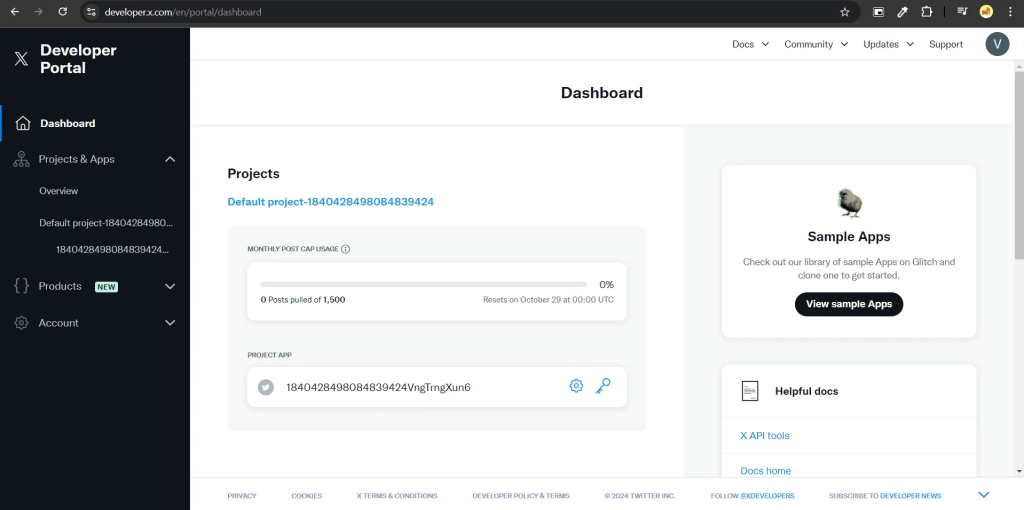
- Select “Overview” (1) → “Install” (2) → In the “User authentication settings” section, select “Set up“
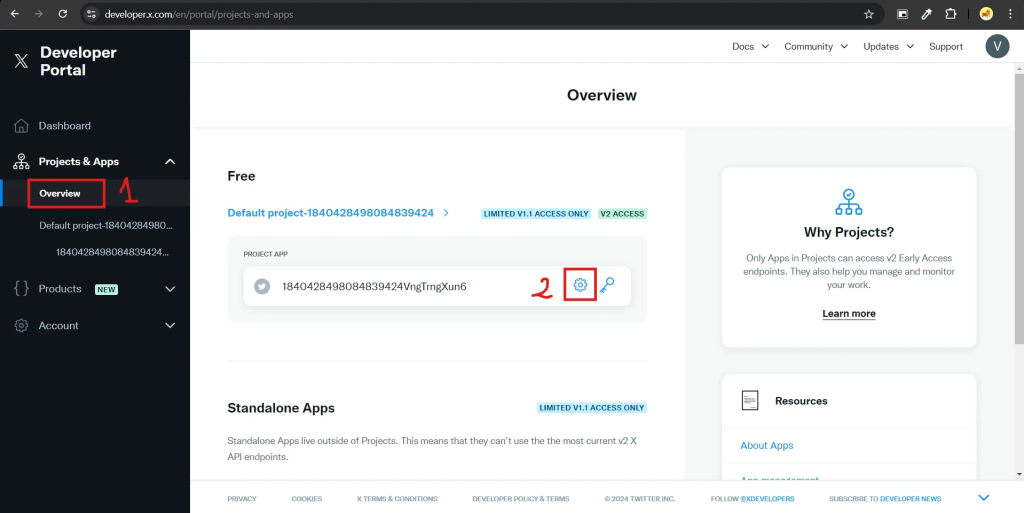
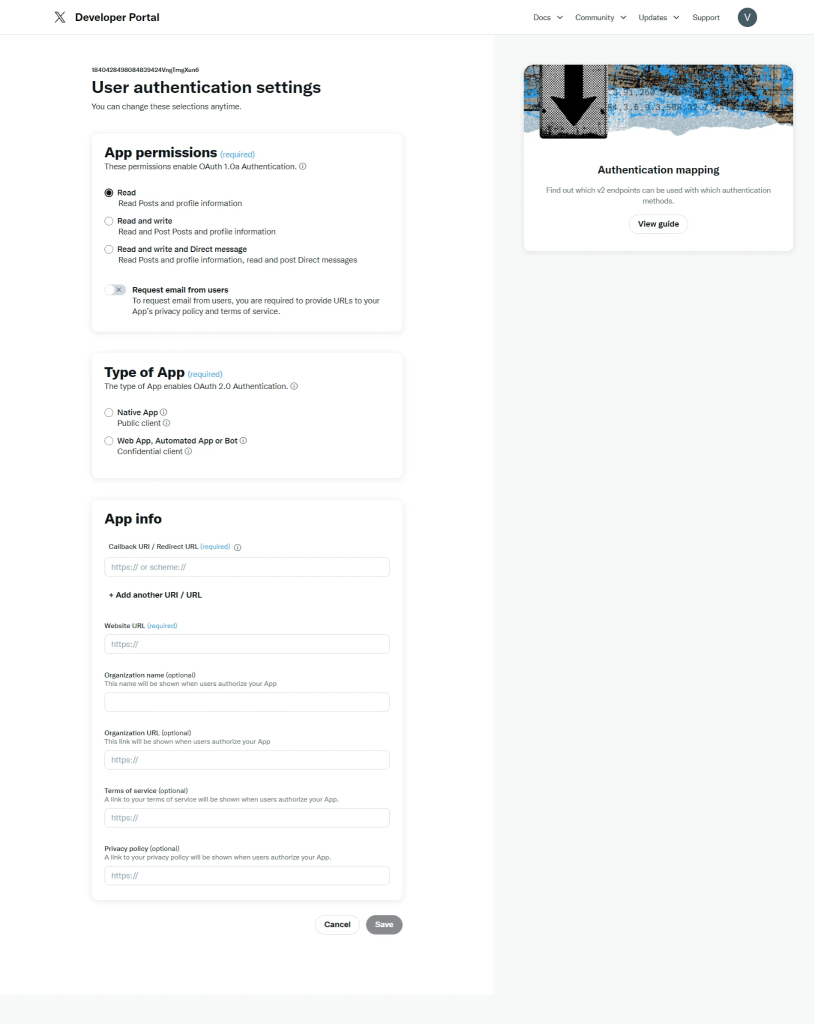
- In the “App permissions” section, select the appropriate permission for your application. About the “Type of app” section, choose “Web App, Automated App or Bot“. In the “App info” section, enter a valid temporary URL in the Callback URI / Redirect URL field to complete the configuration. You will change this URL after configuring Firebase (1*). For the Website URL, enter your website link. Note: you can’t use localhost, so you need to deploy the web or use another valid URL. After filling in all the information, click Save. Make sure to save the Client ID and Client Secret in the env file.
- Click “Keys and Tokens” → “Regenerate” (API Key and Secret). Remember to save your API Key and API Key Secret to configure the Firebase (2*).
Integrate Github for login
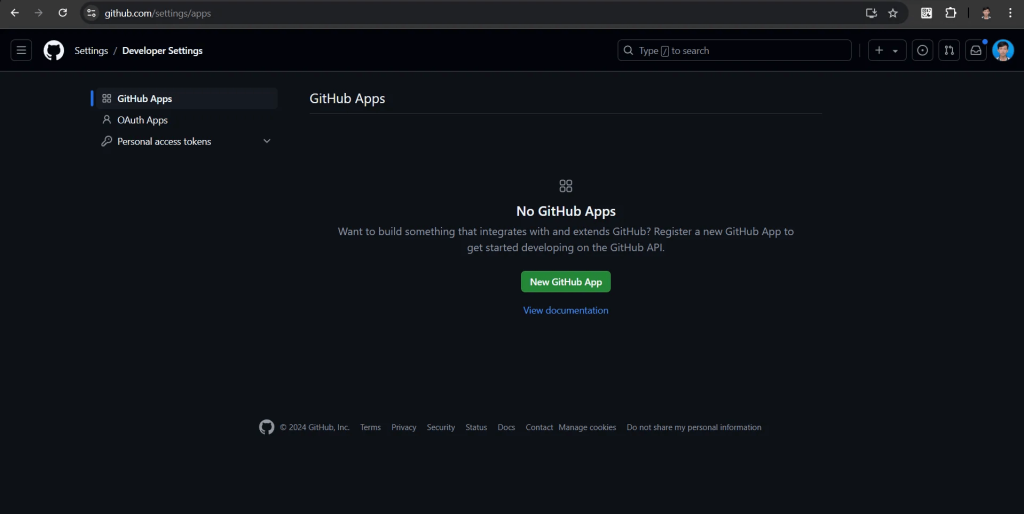
- Go to https://github.com/settings/profile. In the Developer Settings tab → choose OAuth Apps
- Select New OAuth App
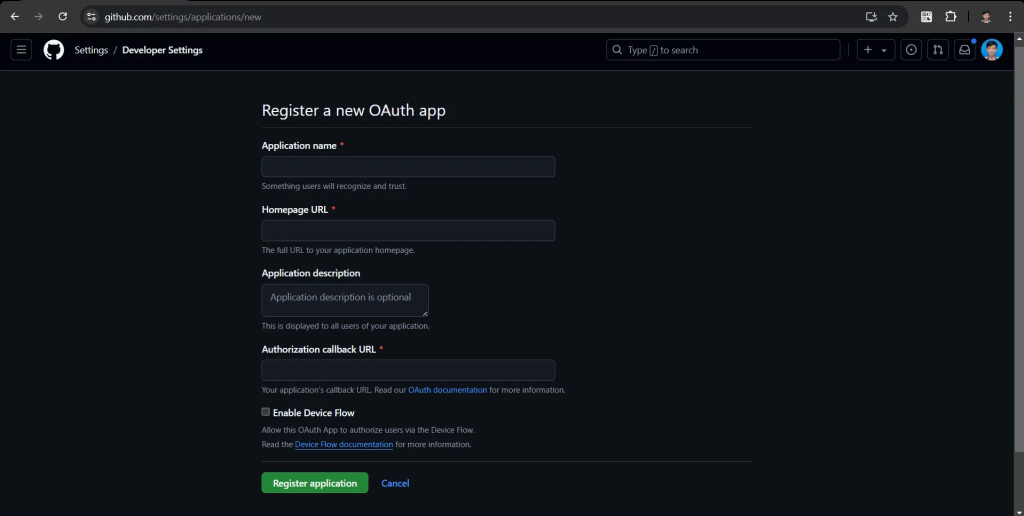
- Fill in all the information with the Authorization callback URL (3)* temporarily set to http:localhost:3000, which will be replaced with the link from Firebase later.
- Save Client ID and Client secrets in env. file (4)*
VITE_GITHUB_CLIENT_ID=Client IDVITE_GITHUB_CLIENT_SECRET=Client secrets
Config Firebase to integrate social login
- Register at https://console.firebase.google.com/u/1/ by using your Google account. Then, select Get started with a Firebase project to get started.
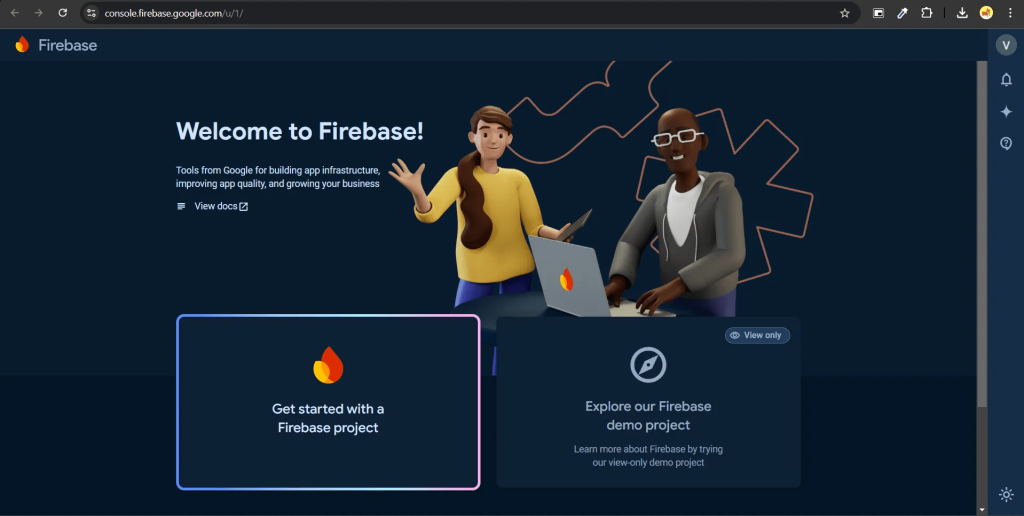
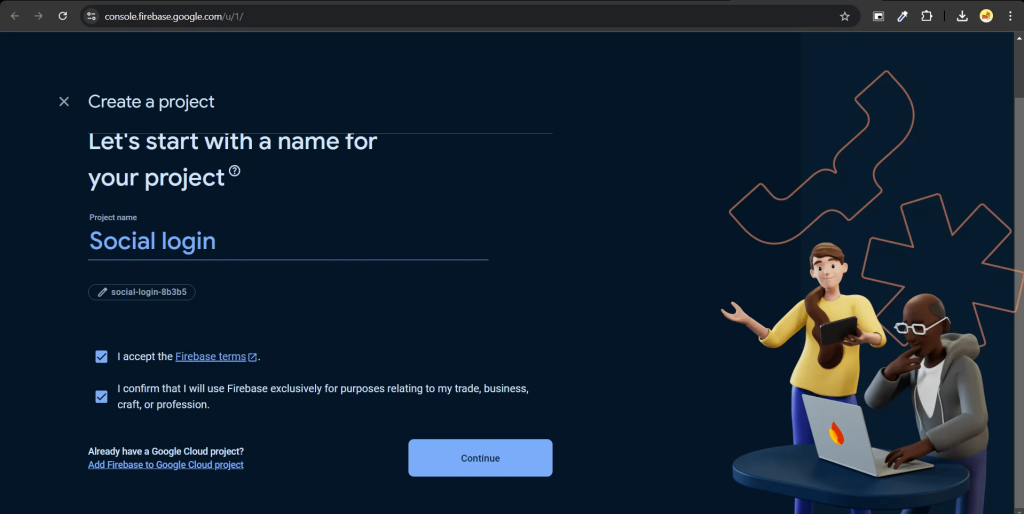
- Fill in the necessary details, then click Continue twice and choose Create project. You need to wait a moment for the system to configure your project.
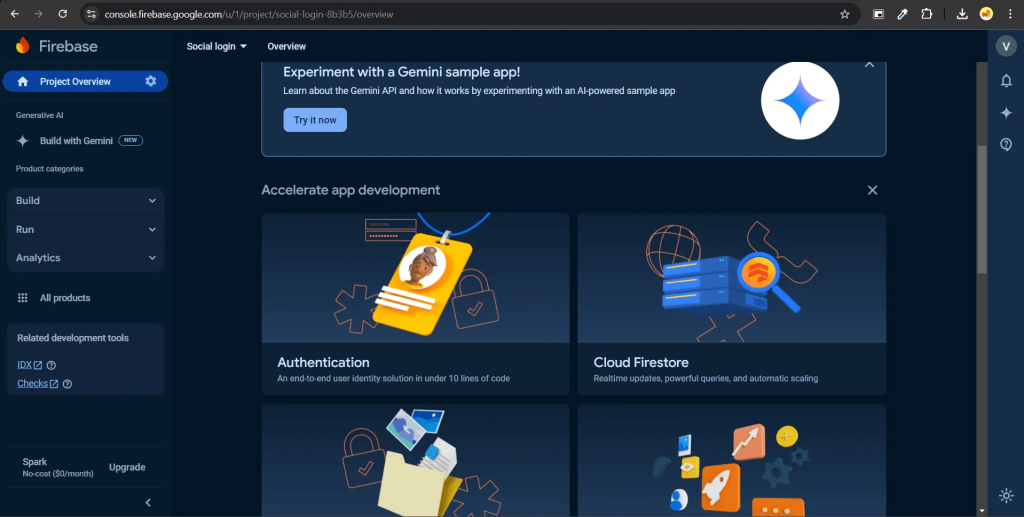
- After creating a project, select Authentication, next choose Get started, and finally click Sign-in method. First of all, we should configure Twitter..
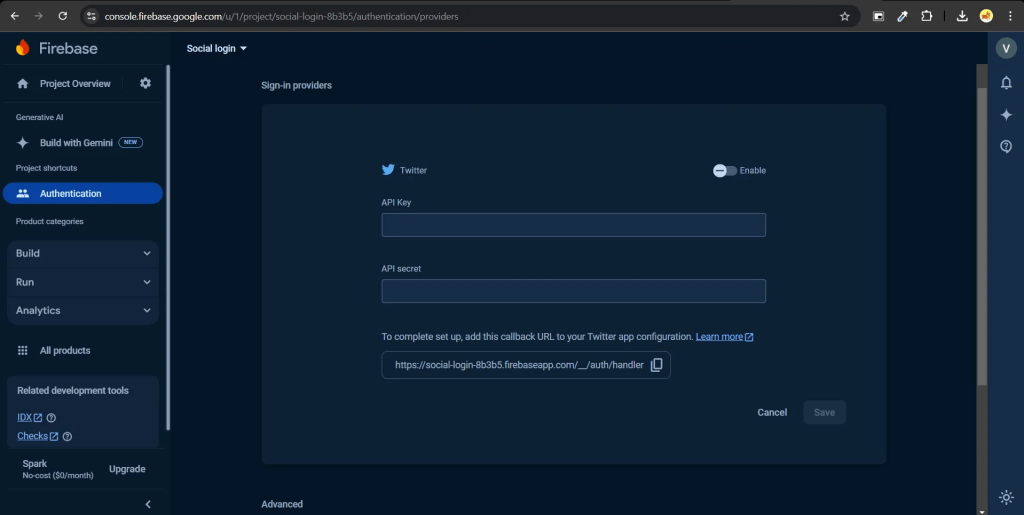
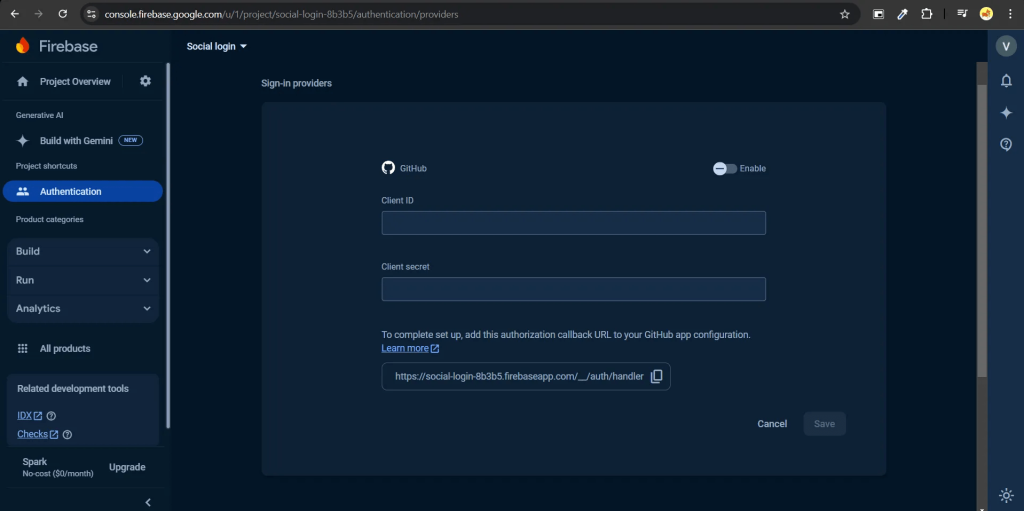
- Select Twitter, and enter the API Key and API Secret obtained in (2*). Copy the handler link and paste it into Callback URI / Redirect URL (1)*. Then click Save
- Choose Add new provider → Github. Enter the Client ID và Client secret created in (3).* Then we copy the URL handler and fill in the Authorization callback URL (3).* Click Save.
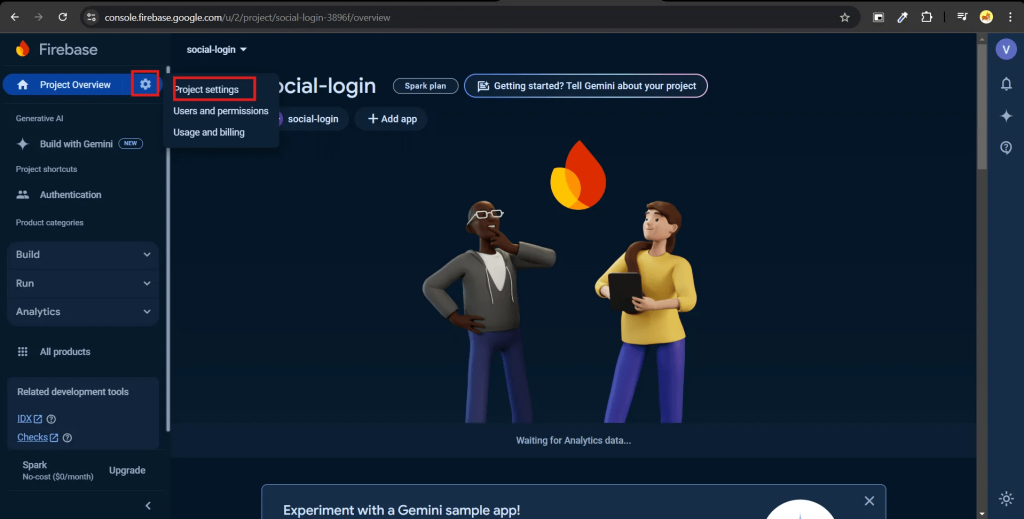
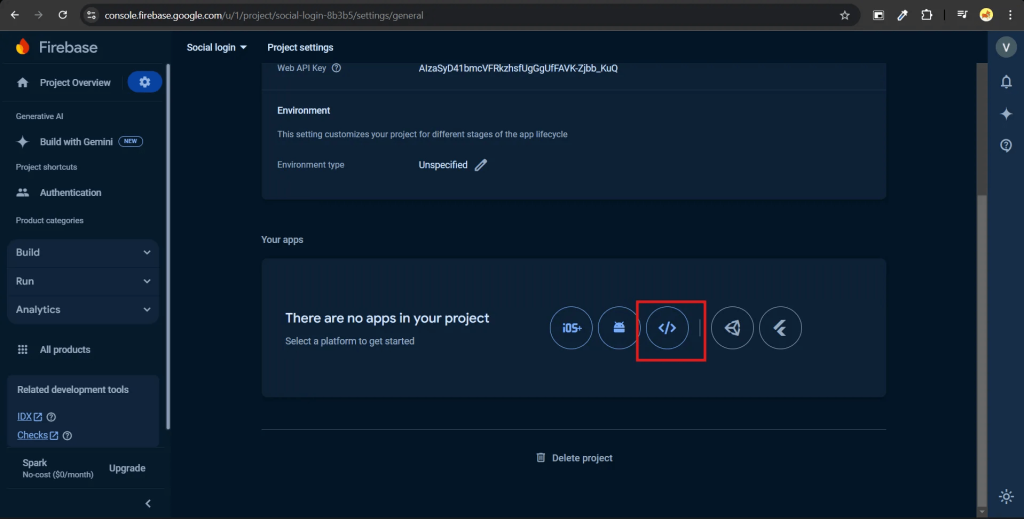
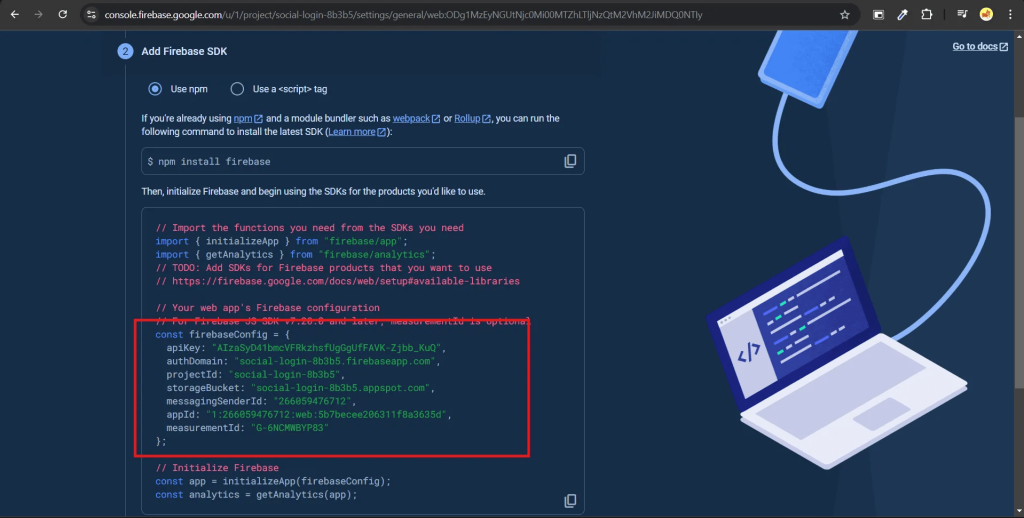
- To get the Firebase configuration information for your web, we click Project settings in the Project Overview tab. Choose icon </>
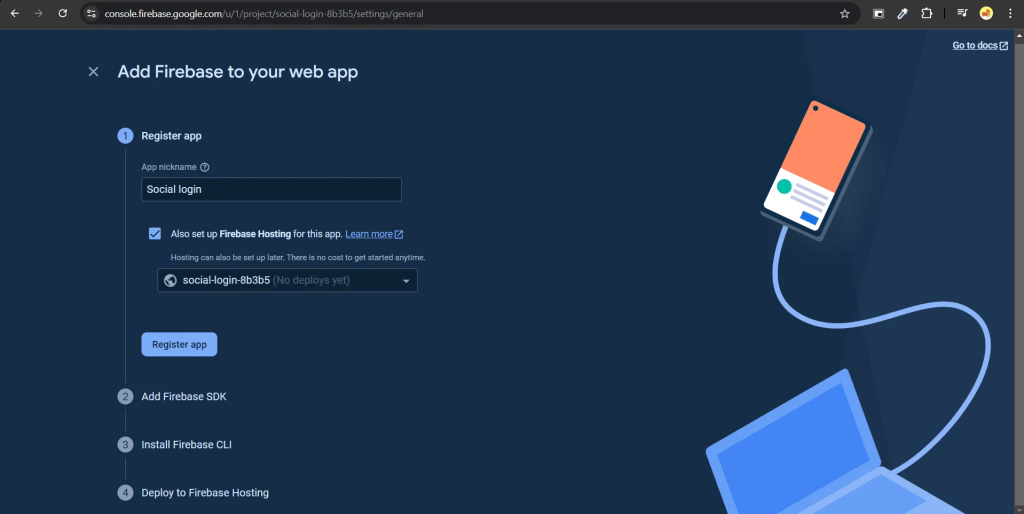
- Fill in all the information in the form then select Register App
- Enter the information from the firebaseConfig section into the corresponding fields in the env file.
VITE_FIREBASE_PROJECT_ID=projectId
VITE_FIREBASE_API_KEY=apiKey
VITE_FIREBASE_MESSAGE_SENDER_ID=messagingSenderId
VITE_FIREBASE_AUTH_DOMAIN=authDomain
VITE_FIREBASE_STORAGE_BUCKET=storageBucket
VITE_FIREBASE_APP_ID=appId
VITE_FIREBASE_MEASUREMENT_ID=measurementId
Screen flow of social login
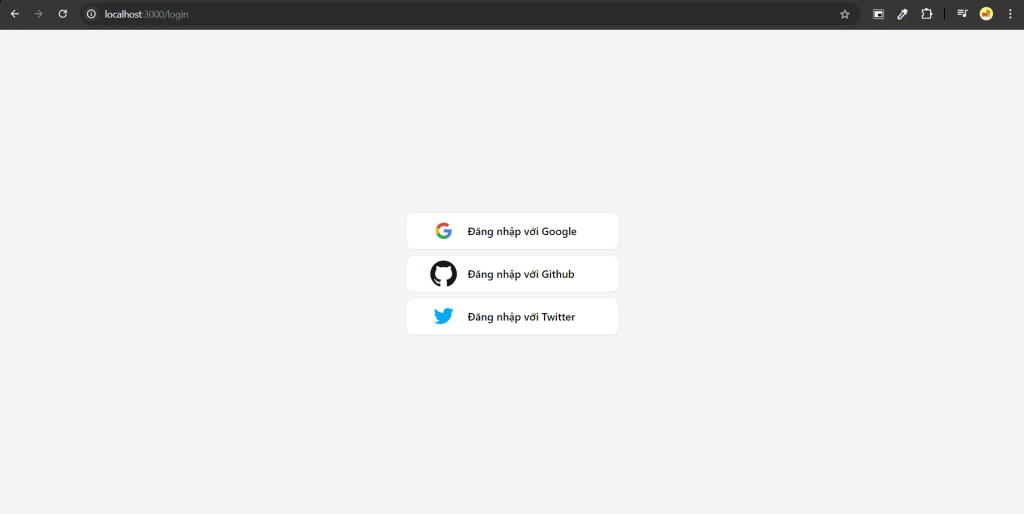
Login with Google
- Select Log in with Google
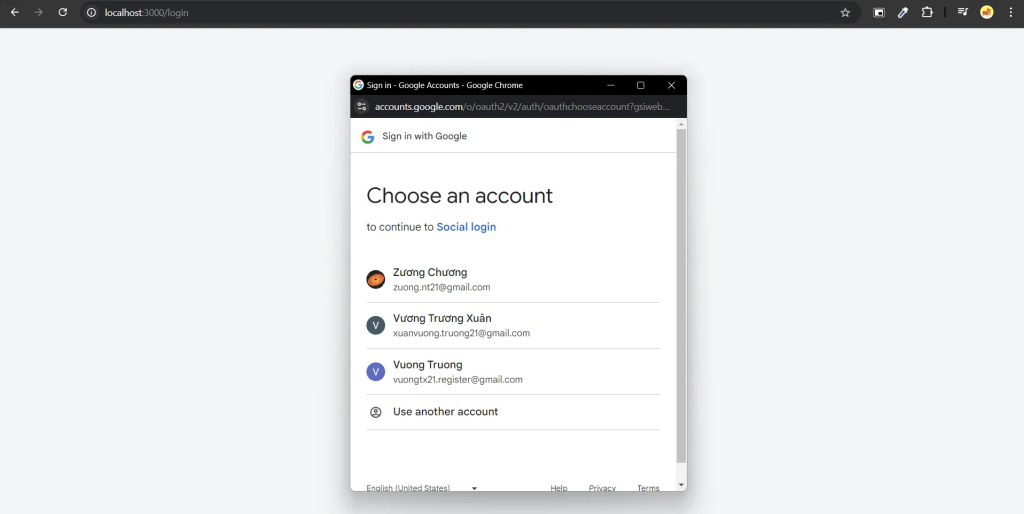
- Choose your account, or register another account
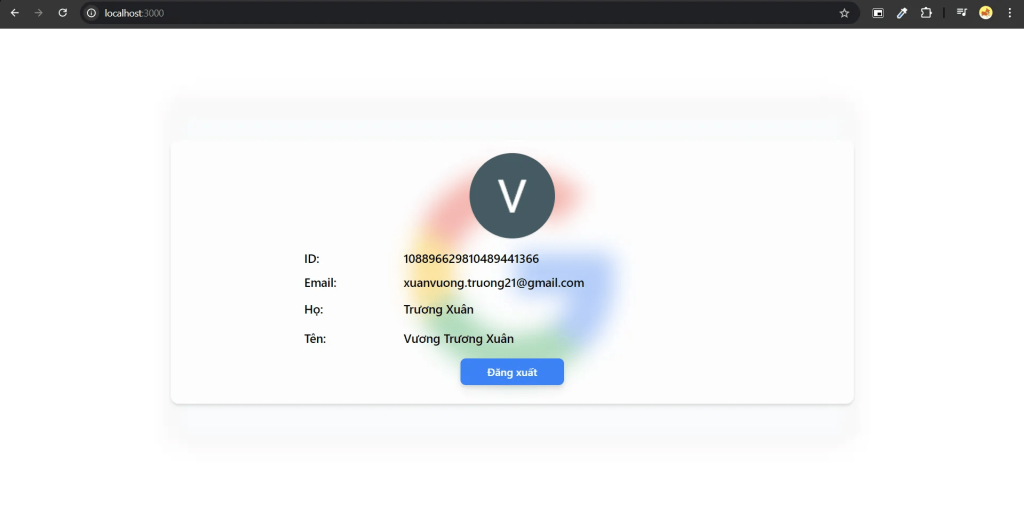
- You will receive a notification of successful registration.
Login with Twitter
- Select Log in with Twitter

- Choose Authorize App
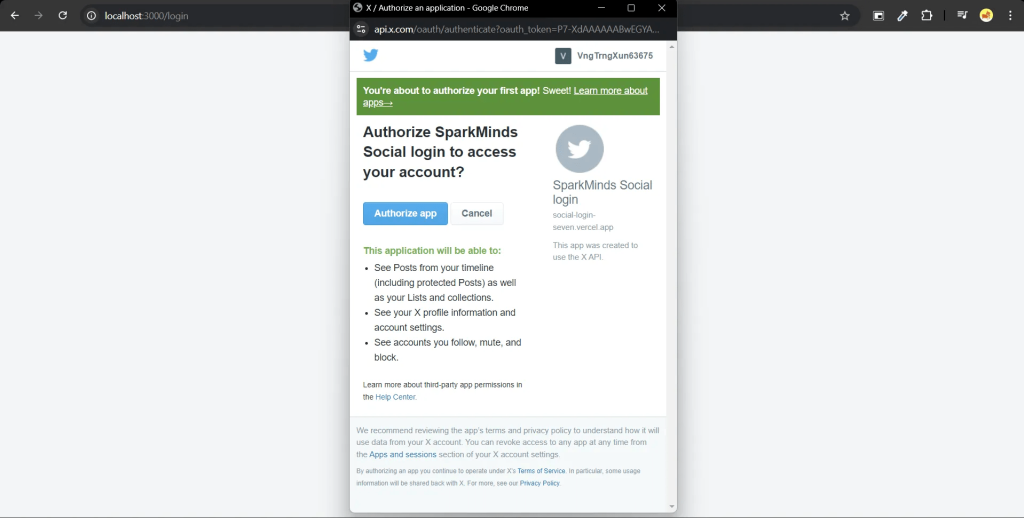
- You will receive a notification of successful registration.
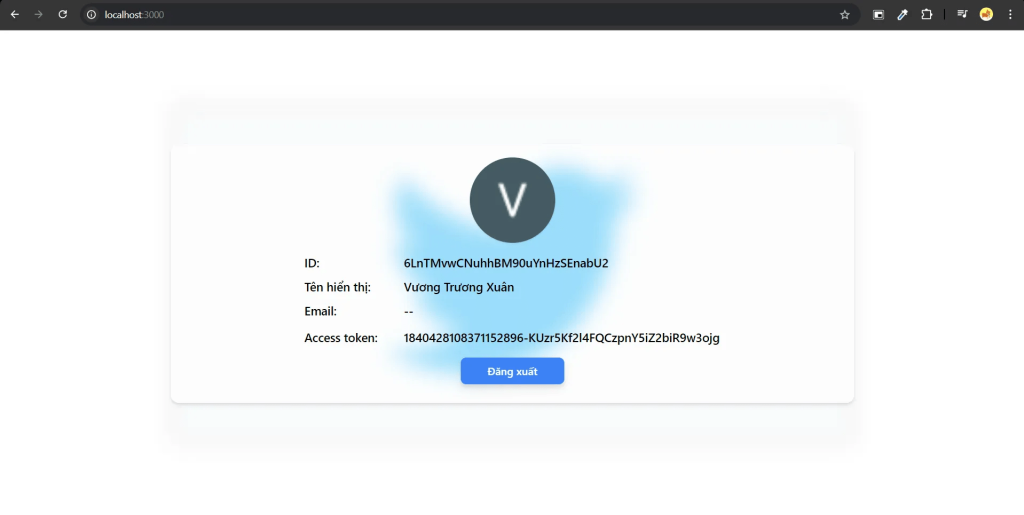
Login with Github
- Select Log in with Github

- Click Authorize button
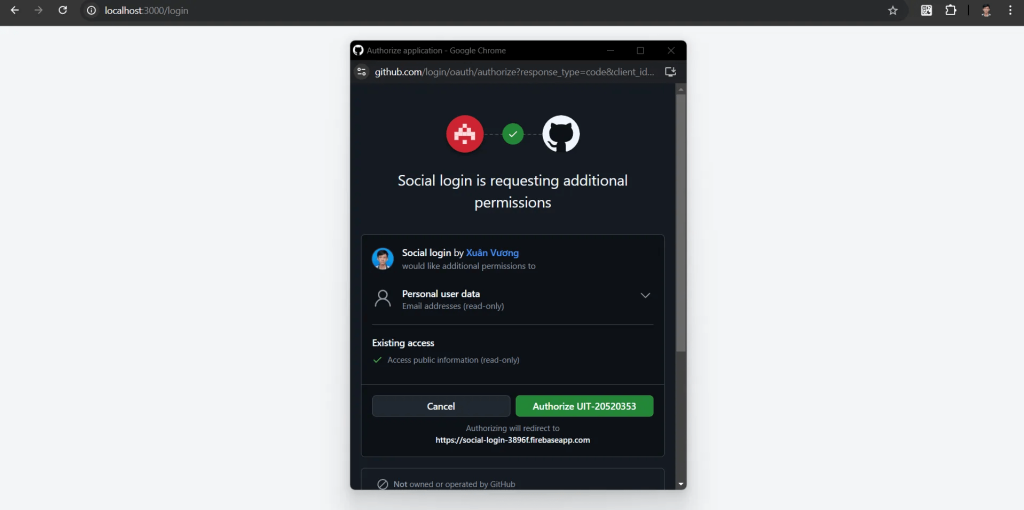
- You will receive a notification of successful registration.
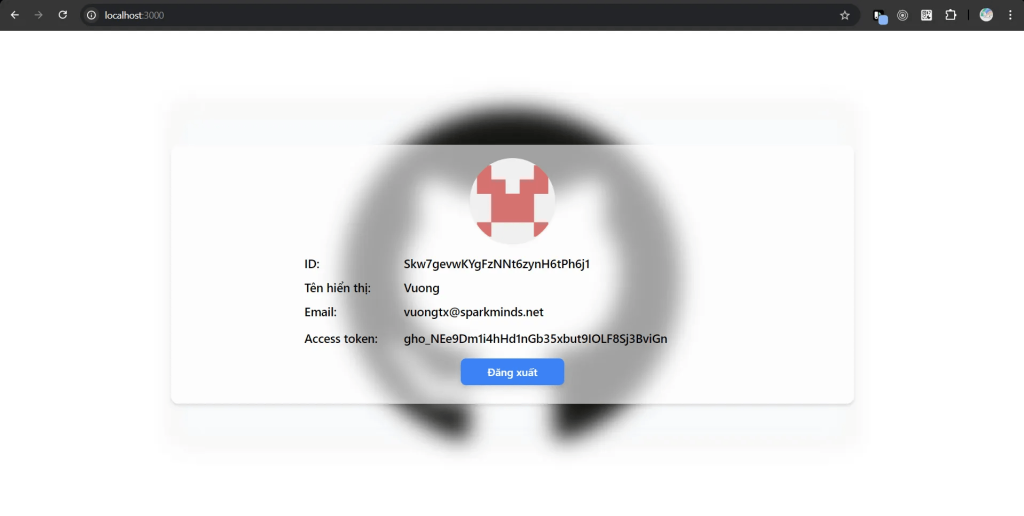
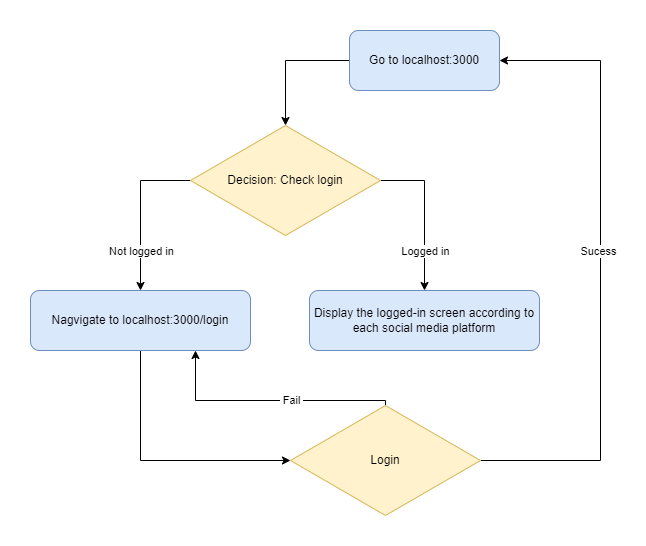
Screen flow
The chart illustrates a social login workflow for a web application. Here’s a step-by-step explanation:
1. Login – The user begins to sign up for an account on a random social media platform.
● If the login attempt fails:
The user is directed back to the localhost:3000/login page to try logging in again.
● If the login attempt is successful:
The system redirects to localhost:3000 and goes to Decision: Check login.
2. Decision: Check Login Status – The system checks whether the user is already logged in.
● If the user is logged in:
It proceeds to display a logged-in screen tailored to the specific social media platform the user is accessing.
This leads to a success endpoint.
● If the user is not logged in:
The system navigates to the login page at localhost:3000/login.
We made a diagram as shown below to describe how social login works
Finally, after reading this article, I hope you can implement social login integration by yourself. They are very easy steps to follow. If want to develop a web or applicaton that relating to social login you can learn more about our Custom Web/App Implementation Service and contact us to get the quotation.


