This article provides a detailed guide on integrating Keycloak for authentication and authorization in a Java-based resource server. The integration utilizes OAuth2 and OpenID Connect protocols, with Keycloak as the identity provider (IdP). The Java application functions as a resource server, validating access tokens.
Prerequisites for Keycloak integration
Before starting, ensure you have the following:
Keycloak installed and running (locally or via Docker).
A Keycloak realm and clients configured for both the backend and frontend applications.
A Java (Spring Boot) project for the backend.
Basic knowledge of OAuth2/OpenID Connect protocols.
Keycloak integration implementation
Keycloak setup
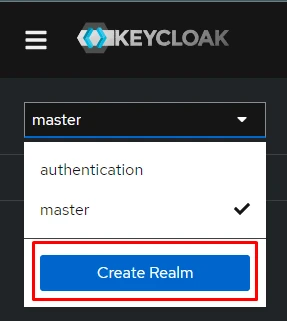
Step 1: Create a Keycloak Realm
Log in to the Keycloak Admin Console.
From the sidebar, click “Add Realm”.
Enter a realm name (e.g., authentication) and click Save.
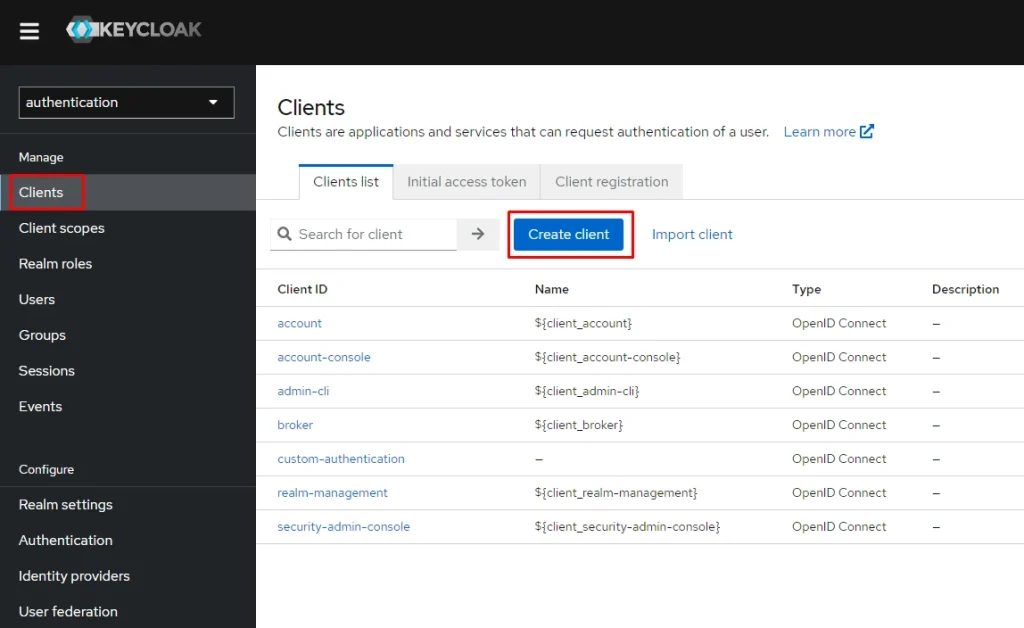
Step 2:Create a Client for the Java Resource Server
Select a Realm that you want to setup
Go to Clients and Click on Create client
Click “Create”
Configure the client with the following:
At the general setting section:
Client type: OpenID Connect
Client ID: input your client ID (e.g., custom-authentication)
At the capability config: left by default
Creating Roles for spring boot authorization process:
Keycloak provides a convenient way to create roles, assign them to users, and manage application roles effectively. In Keycloak mainly there are two types of roles.
Client Roles: These roles are specific to a particular client application. Clients are created in the Keycloak administration interface and can be assigned to users within a specific client.
Realm Roles: These roles represent a realm, which can be a real or virtual application domain. Realm roles are applicable to all clients within a realm and can be assigned to users across the entire realm.
And in addition to these, there are composite roles. A composite role is not a role type but a special role that includes multiple authorities.
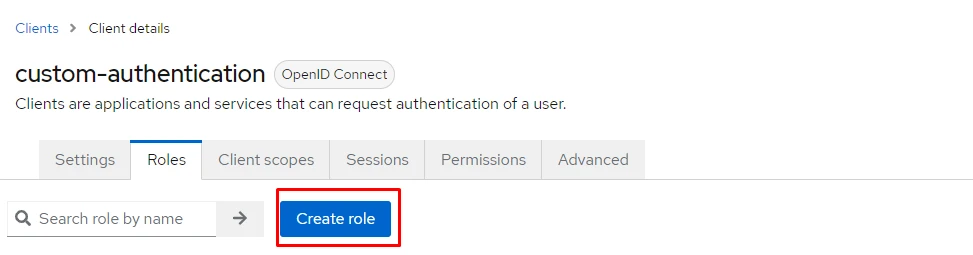
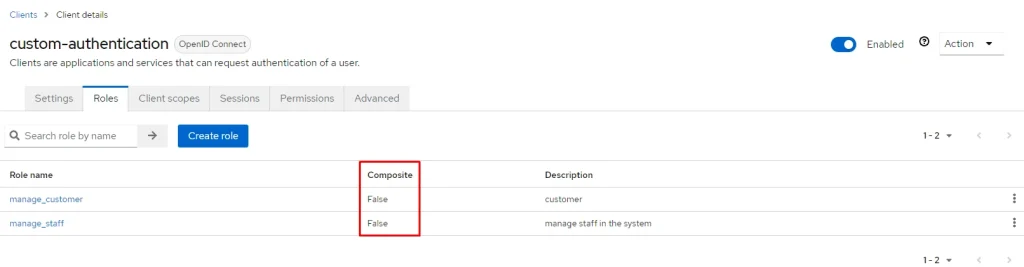
Firstly, we will create two client roles called [manage_customer] and [manage_staff] for customer and staff management. To do this, I click on the client that I created (custom-authentication) and then click onCreate role :
Role created in the Client has its composite status set to False by default
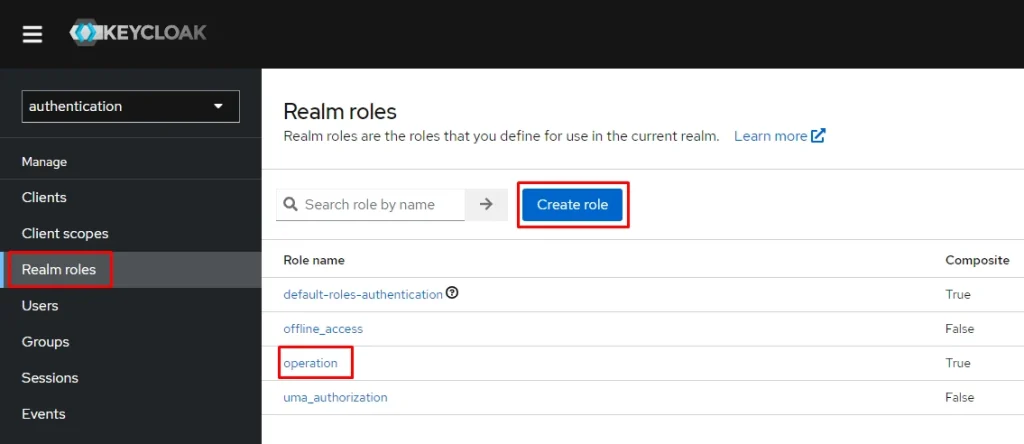
After that we will create two realm roles. To do this, navigate to the Realm Roles page to create roles.
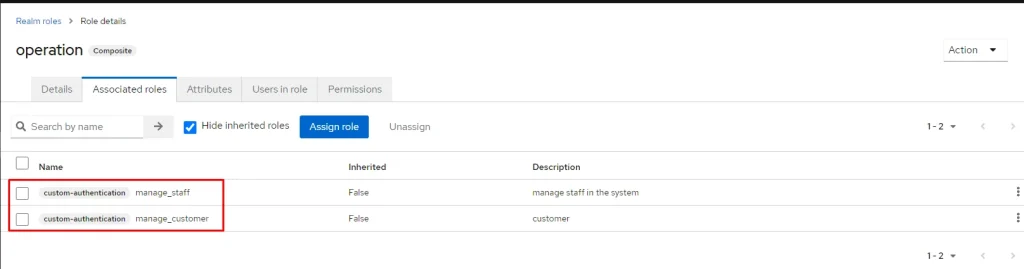
Next, create the operation role and associate it with two created client-role that already created in the previous step
Creating Users:
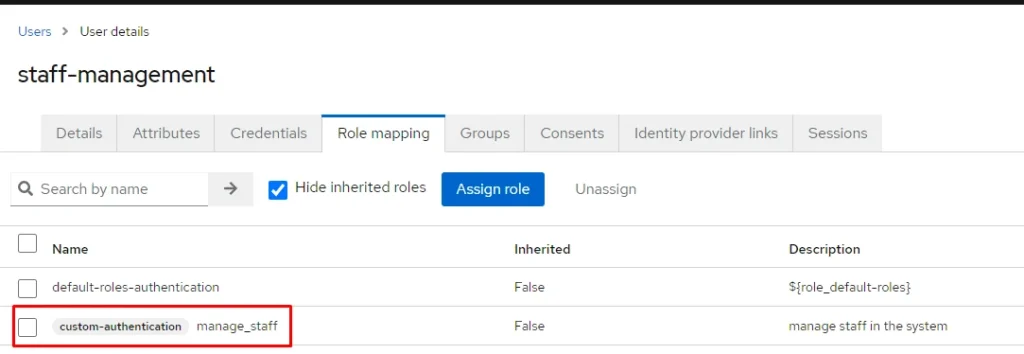
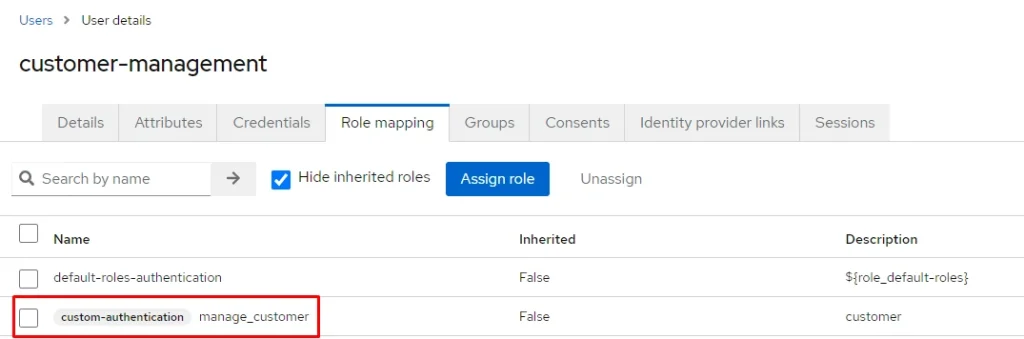
The last part that needs to be added is the user element. We go to the Users page and create two users and assign created Realm role to these customers:
Customer-management admin: with role manage_customer
Staff-management admin: with role manage_staff
Java Resource Server Setup
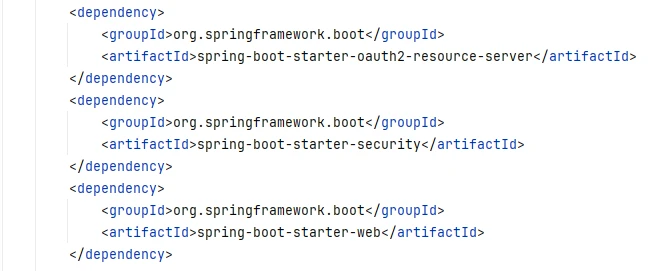
Step 1: Add Dependencies
In your pom.xml, add the necessary dependencies for Keycloak and Spring Security:
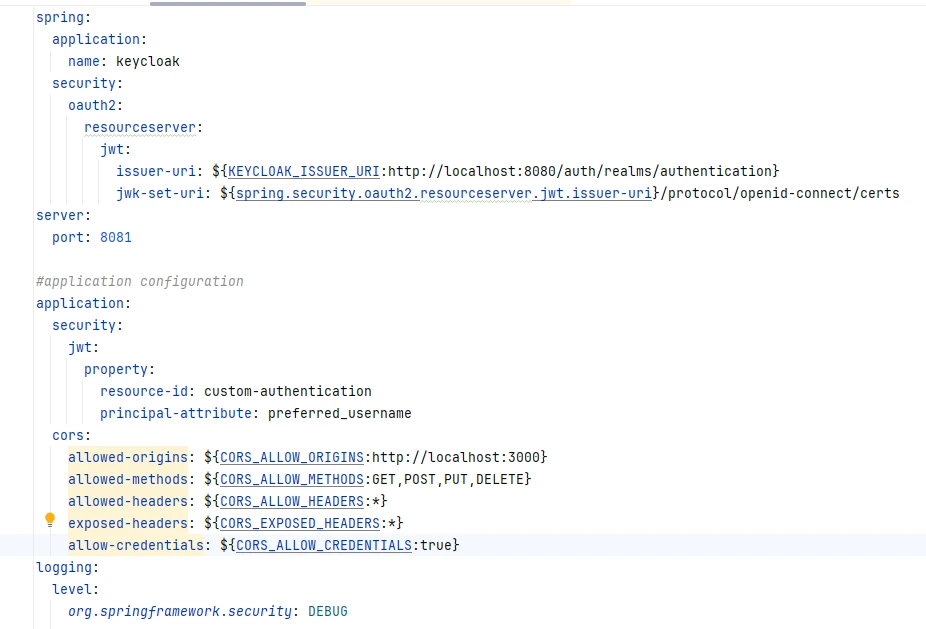
Step 2: Configure application.yml
Step 3: Configure Spring Security for Resource Server
Create a SecurityConfig class to configure security and Config role for two resources which are manage_customer and manage_staff authorities:
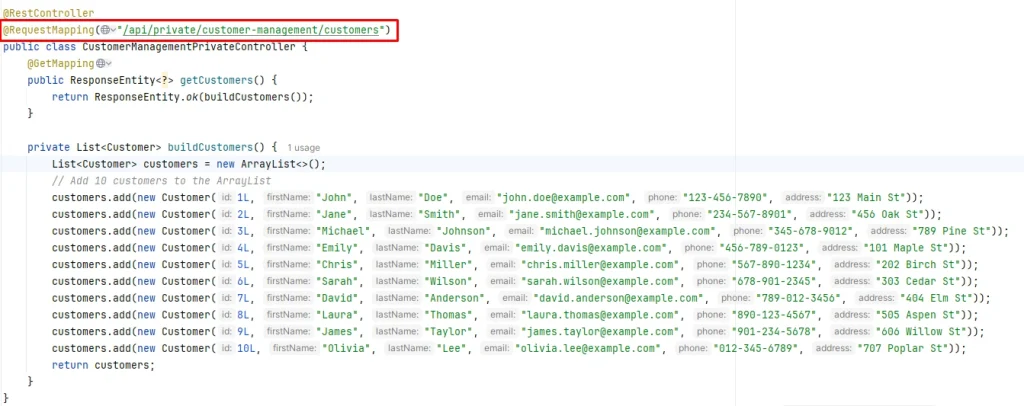
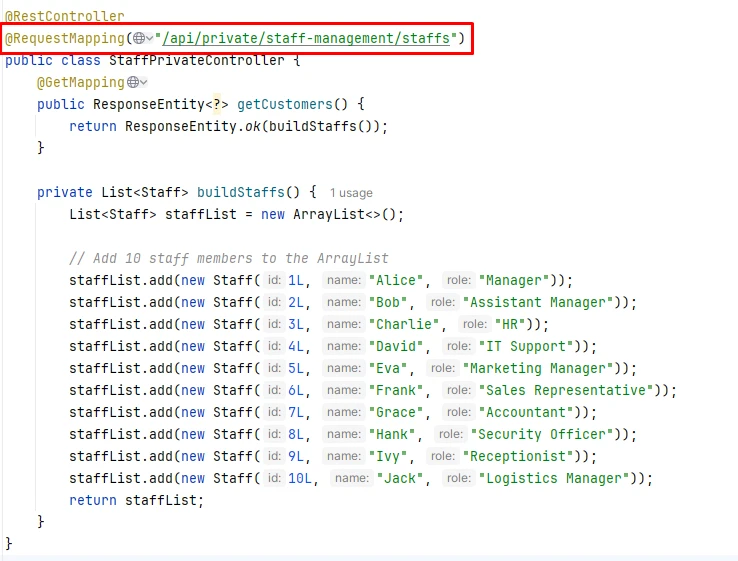
Step 4: Controller Test
Create two samples controller for staff and customer management, the prefix has to match with the definition in the SecurityConfig class
Finally, by reading this article carefully and following the guidelines above step-by-step, I strongly believe you can implement Keycloak integration with the Java source server. If you need someone to implement your project relating to Keycloak, Let’s learn more about our Custom Web/App Implementation Service and contact us. We are always here to help!