Along with the development of blockchain technology, Cryptocurrencies and assets have become more popular. It leads to a high demand for crypto wallets, that help users can safely store their tokens, cryptocurrencies, NFTs… In this article, we will guide you step-by-step on how to build a Chrome extension for a crypto wallet
Crypto wallet extension overview
Crypto wallet extension introduction
Crypto Wallet Extension allows users to securely manage and transfer cryptocurrency directly in their browser. It is also a place where users can interact with many decentralized applications (DApps) and control their data and digital assets through multiple blockchains.
Key features of a crypto wallet extension
The number of features of a crypto wallet extension will be based on the client’s requests. However, in general, it will have 5 main features as below.
Multiple chain support
Multiple wallet support
Send, receive, swap token
Store private key
Simple and intuitive user interface
Chrome extension installation
You can follow the steps below to install a Chrome extension.
Download source code
Install node_modules. (npm i) package using node v20.10.0
Build project (npm run build)
Open Google Chrome and insert this link chrome://extensions/
Turn on Developer mode.
Click “Load unpacked” and then select folder build (folder name is ‘dist’)
Use extension
After finishing all the steps above, you need to deploy the extension on Google Chrome. You can follow Google’s guideline to complete the deployment
How to build a crypto wallet Chrome extension
Build Chrome extension source code
Step 1: Use Vite to create source code reactjs + typescript. (You can refer Vite’s document)
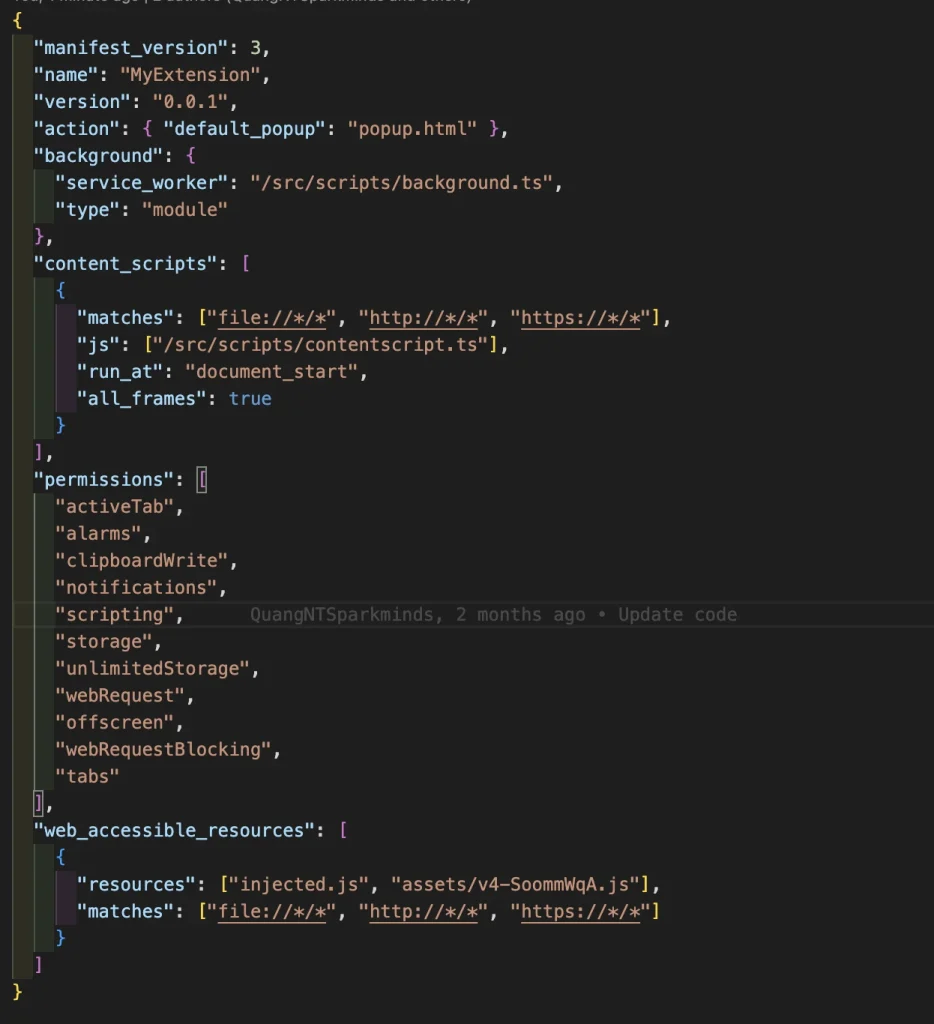
Step 2: Create the manifest.json file in the project’s root. This file interacts with Chrome regarding the extension and permissions
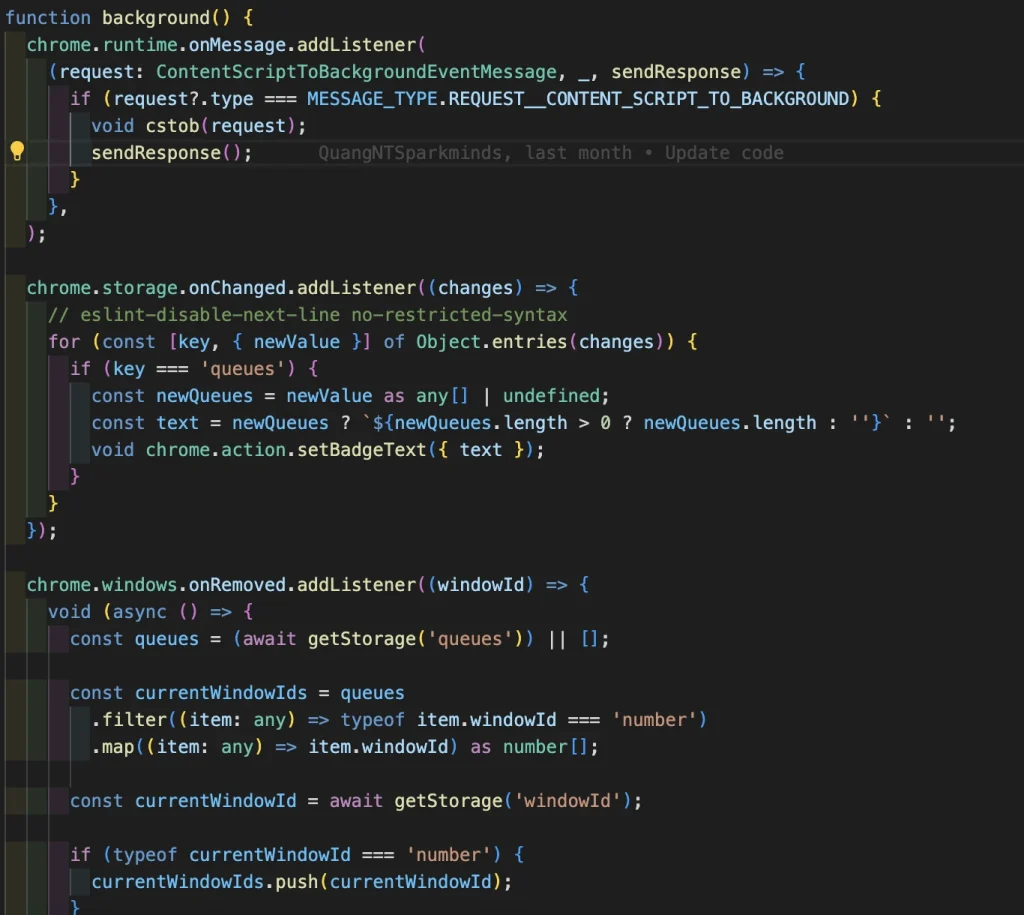
Step 3: Create the background.js file to handle tasks related to the background section.
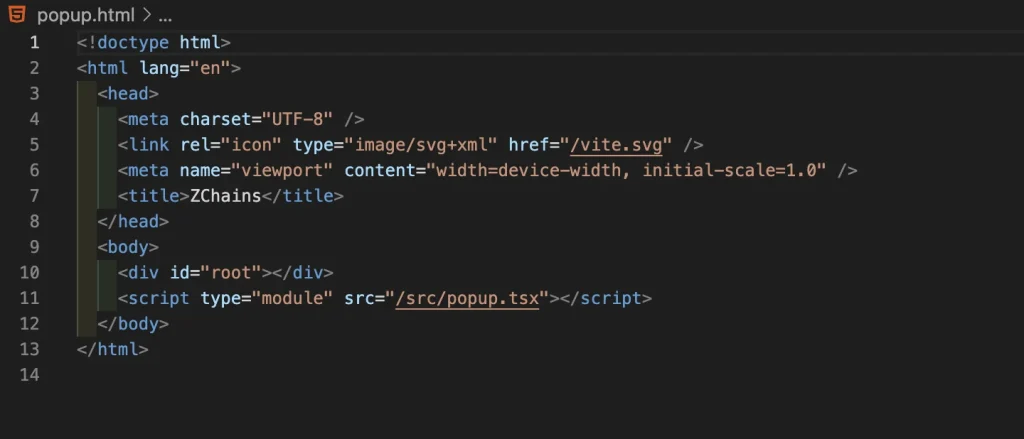
Step 4: Create a popup.html file for extension popup interface.
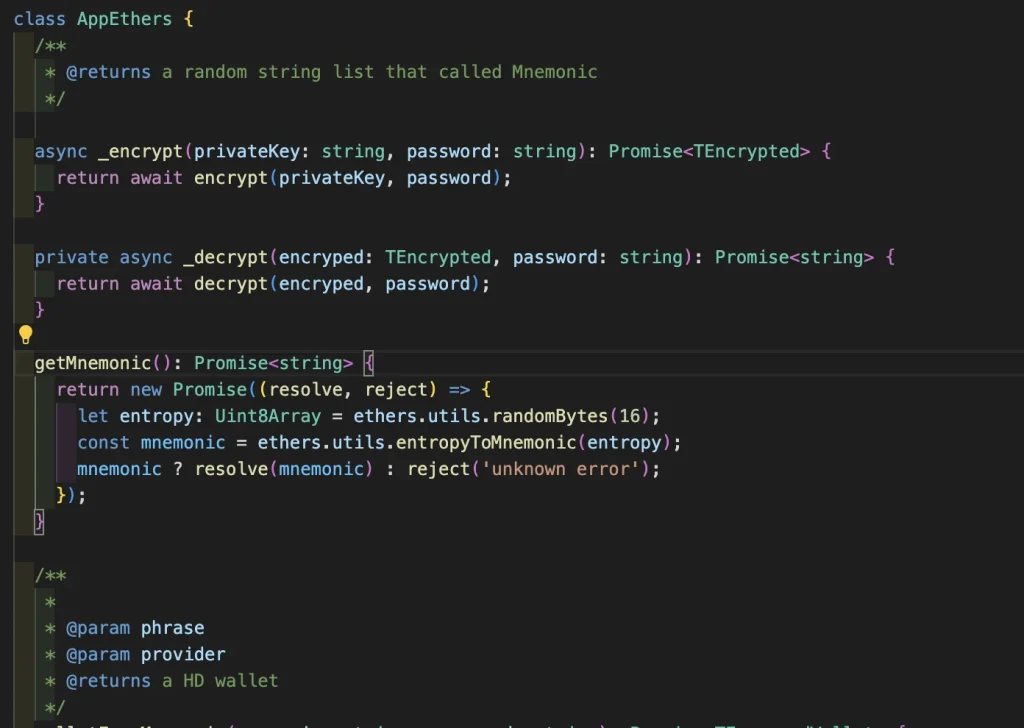
Step 5: Integrate ethers to your project
Create AppEthers file to process tasks related to wallet
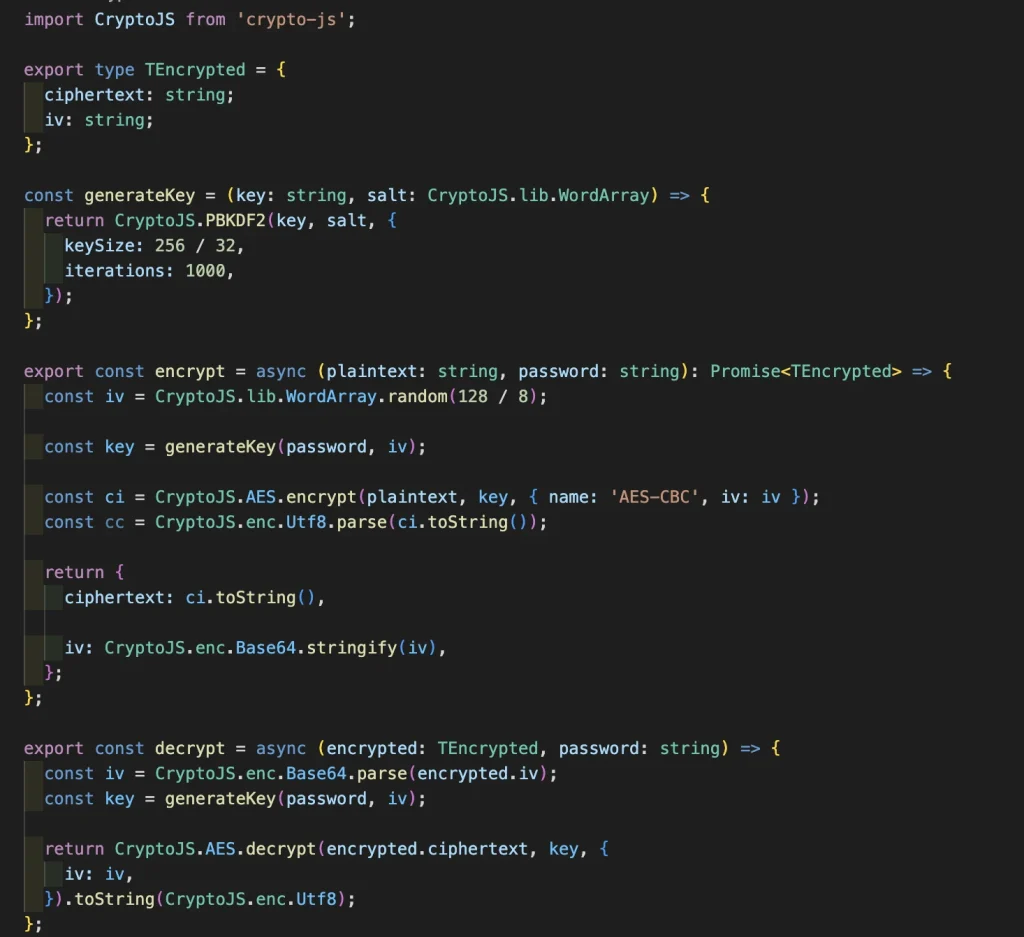
Use crypto-js library to encrypt and decrypt the wallet.
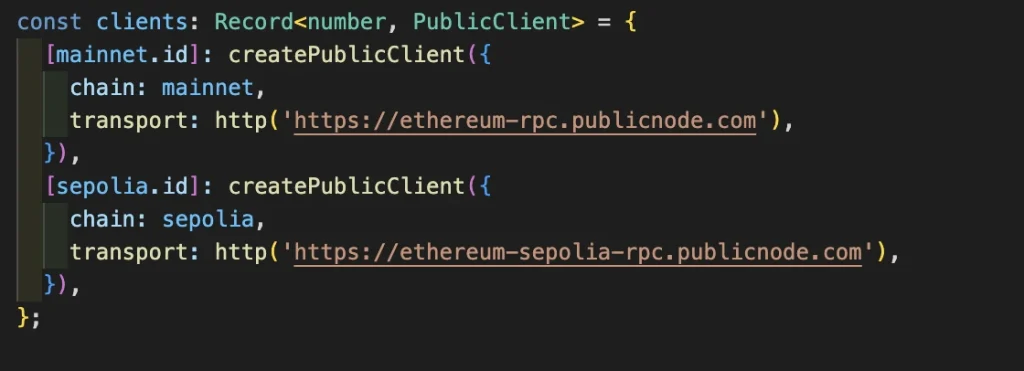
Step 6: Intergrate viem to manage and handle tasks relevant to blockchain.
Initialize the client (by default, we will have two chains: Ethereum and Sepolia-Ethereum)
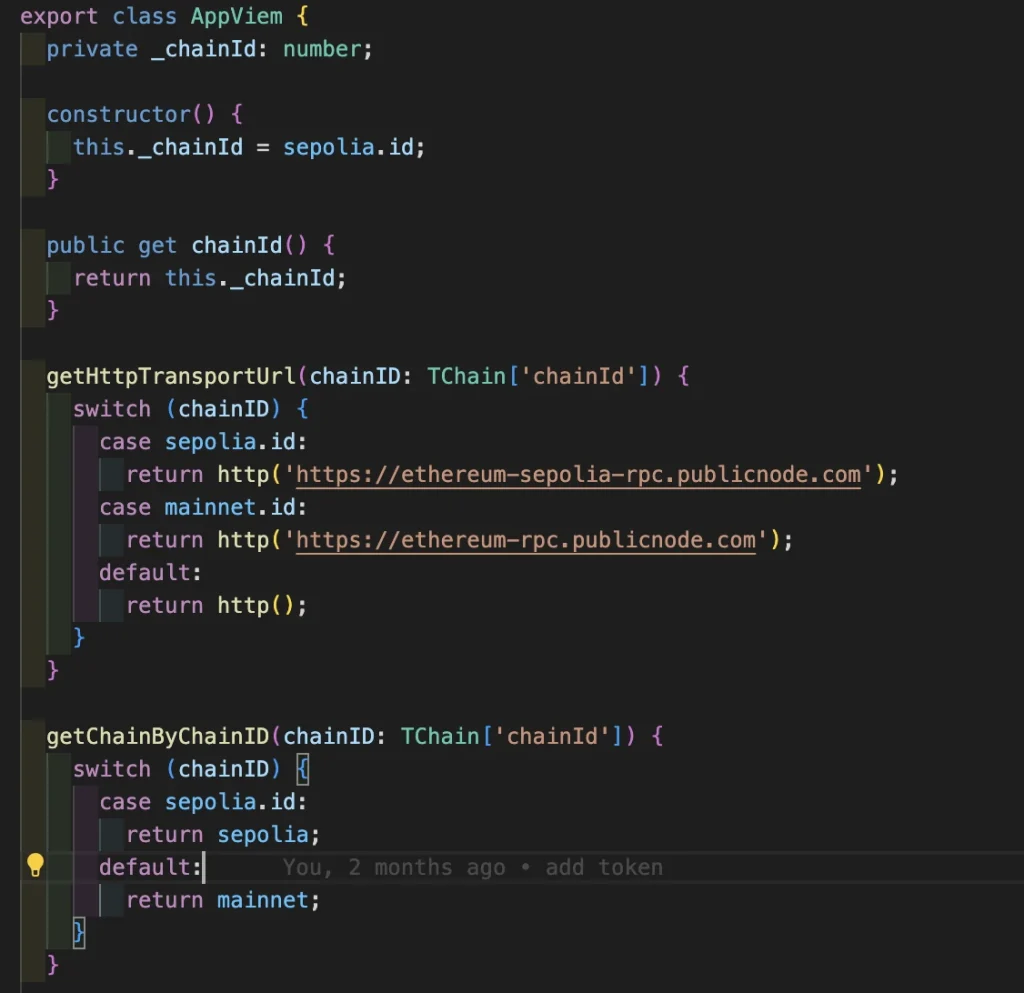
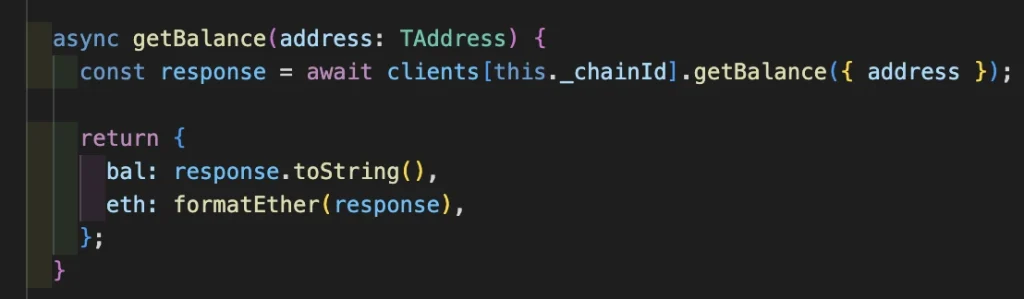
Create the AppView class to handle functions and variables related to the blockchain in the extension.
Use client to process the mandatory features of the extension
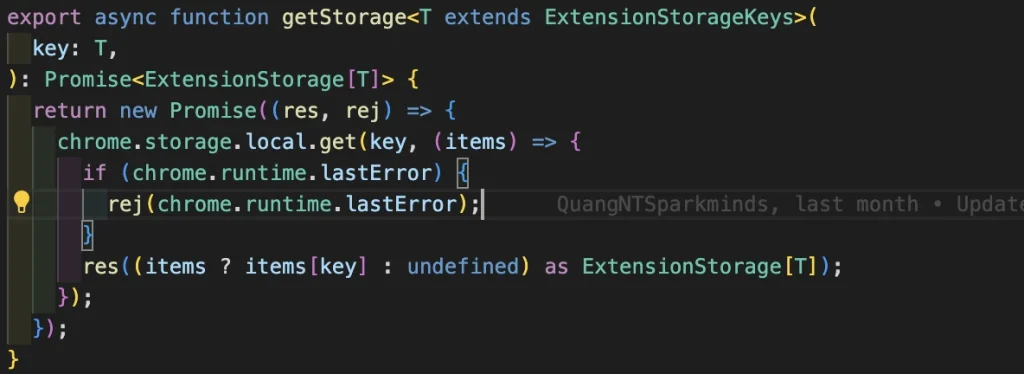
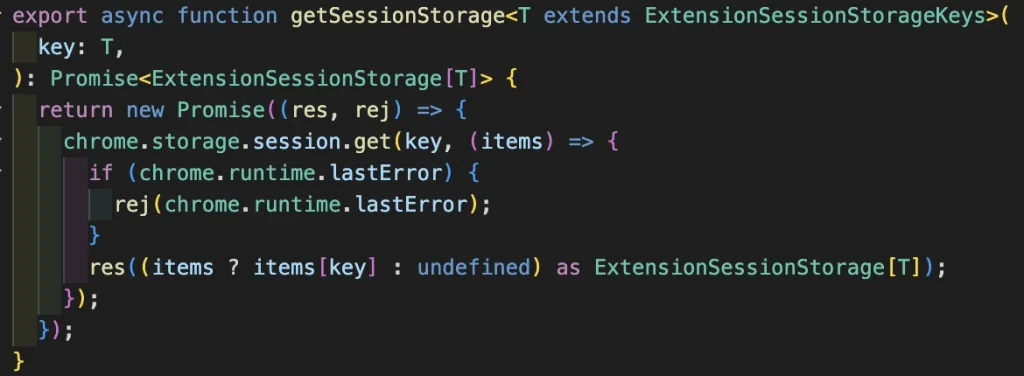
Step 7: Use the chrome.storage.local và chrome.storage.session to manage storage
Chrome.storage.local
Chrome.storage.session
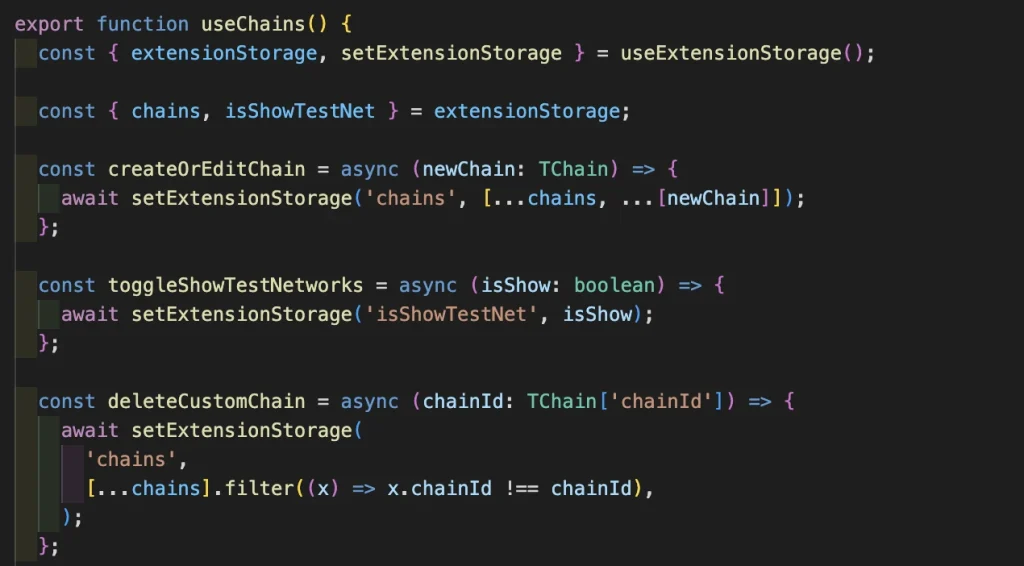
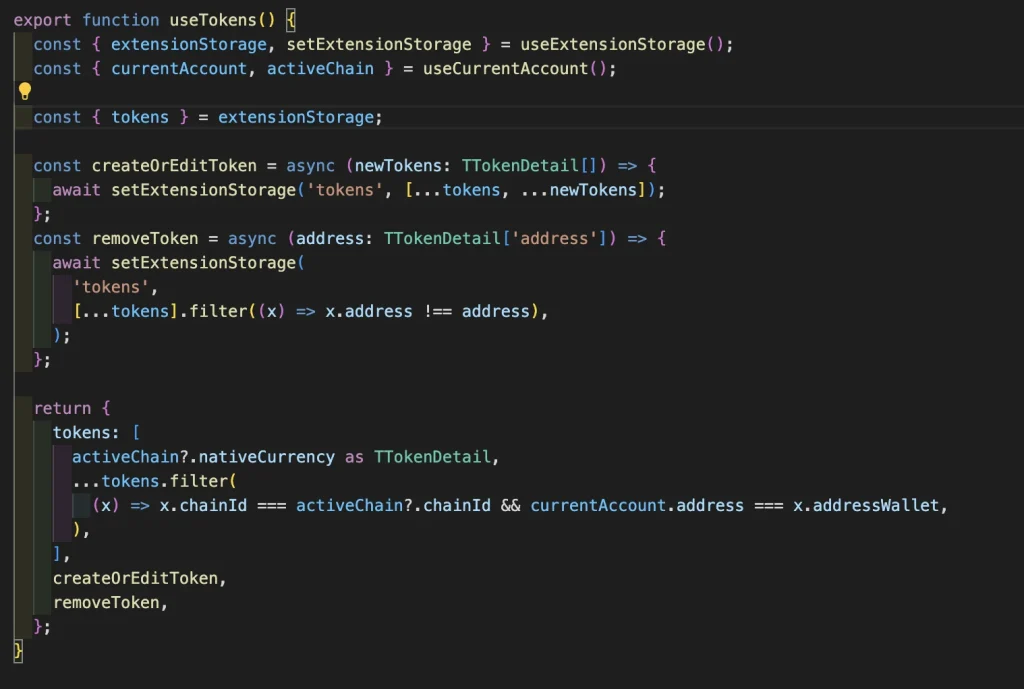
Step 8: Create hooks to react with storage
useChain
useToken
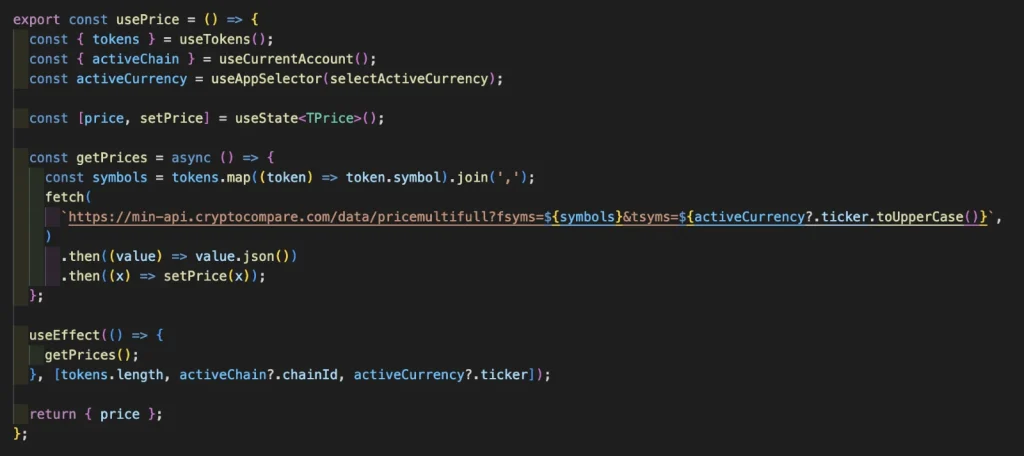
usePrice (use crypto-compare to get the price)
Develop main features
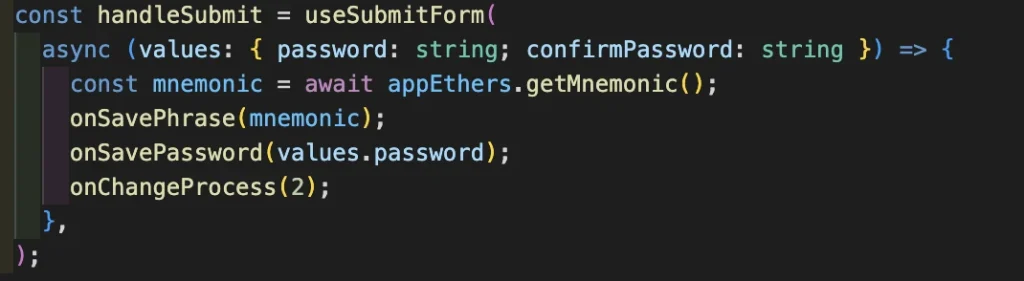
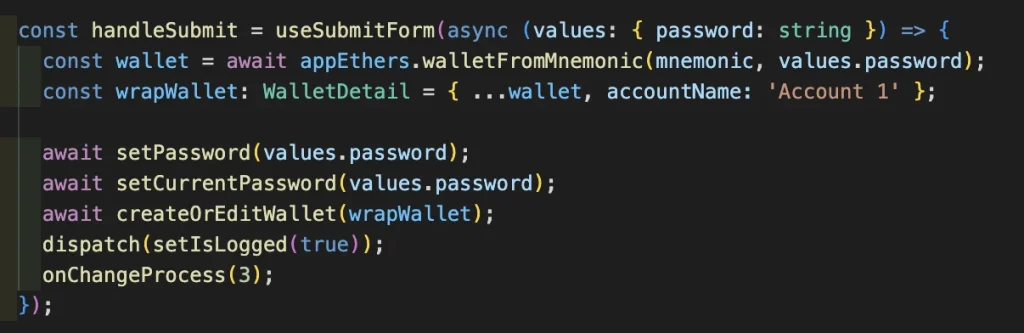
1. Create an account
Use appEthers to create 1 seed phrase
From seed phrase, we use ethers to get the privateKey then we encrypt the password and save in your storage
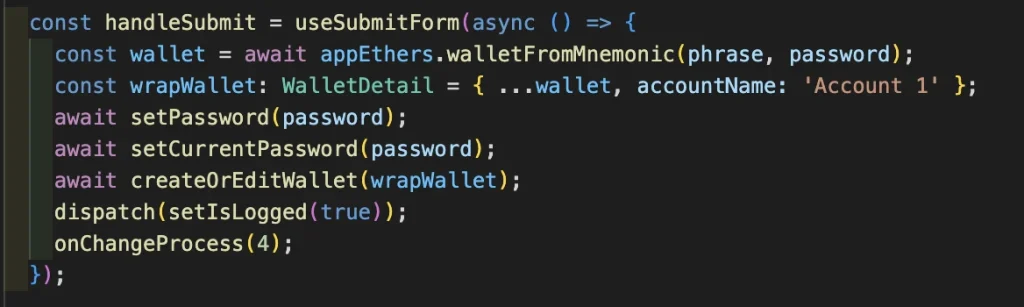
2. Import account
Similar to creating an account, but this time we don’t need to generate a seed phrase. Instead, we use the seed phrase provided by the user directly to retrieve the private key
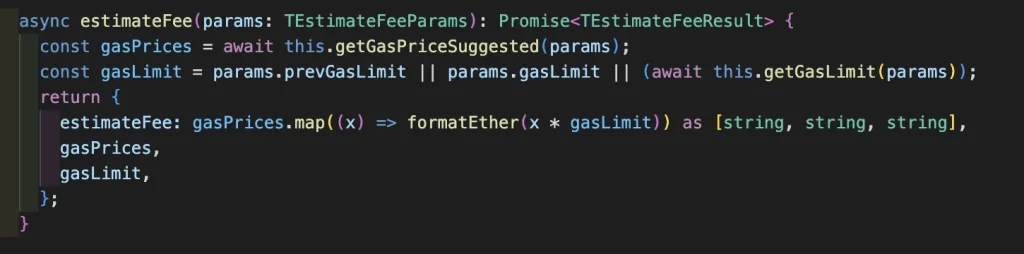
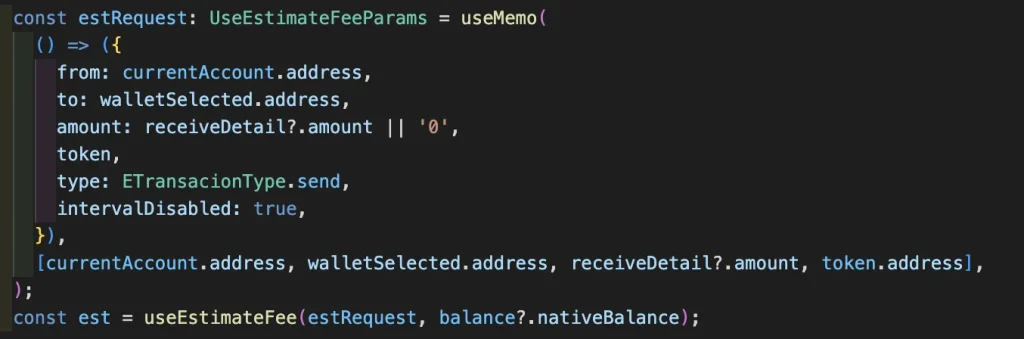
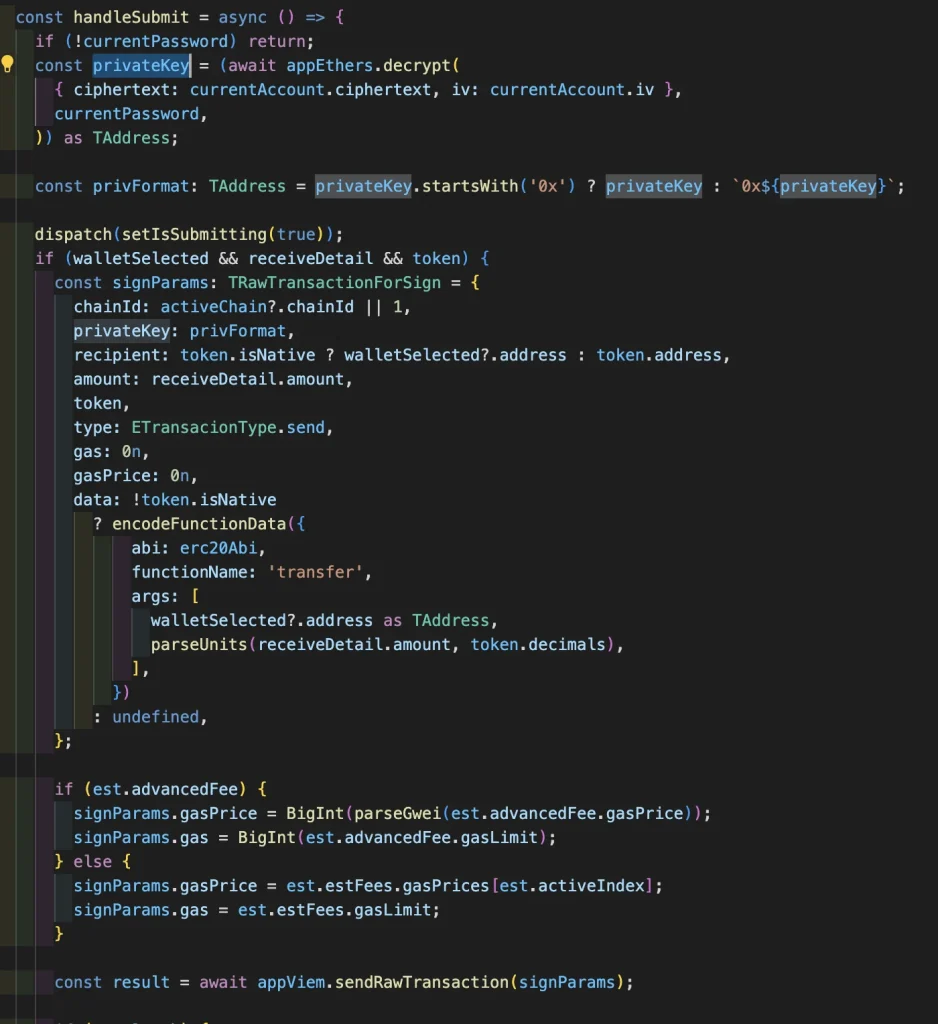
3. Send token
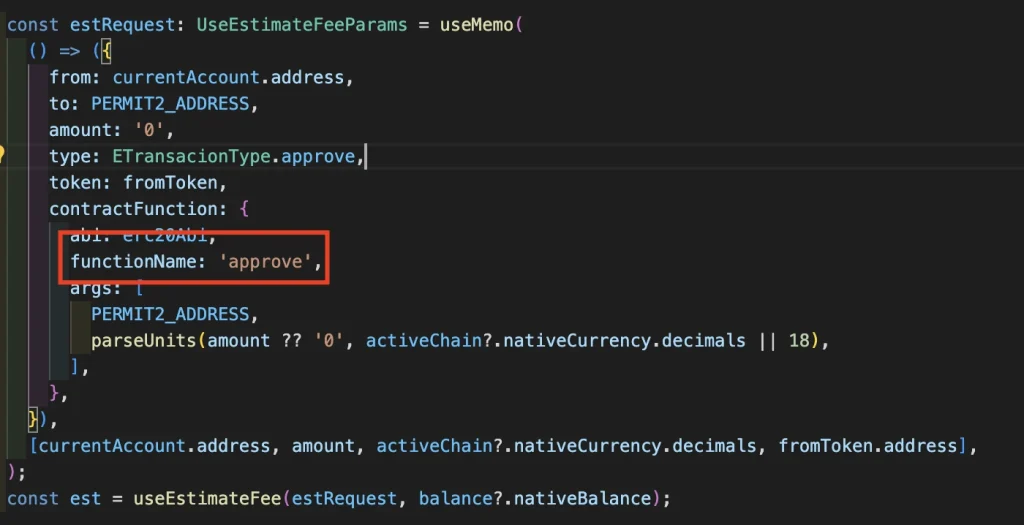
Use the useEstimateFee hook in order that estimate fee returned while sending
Handle the input parameters, then call sendRawTransaction to recall send token balance
Use waitForTransactionReceipt to receive the transaction and save it to the history
4. Receive token
Retrieve the address from the current account and use the antdn library to generate a QR code
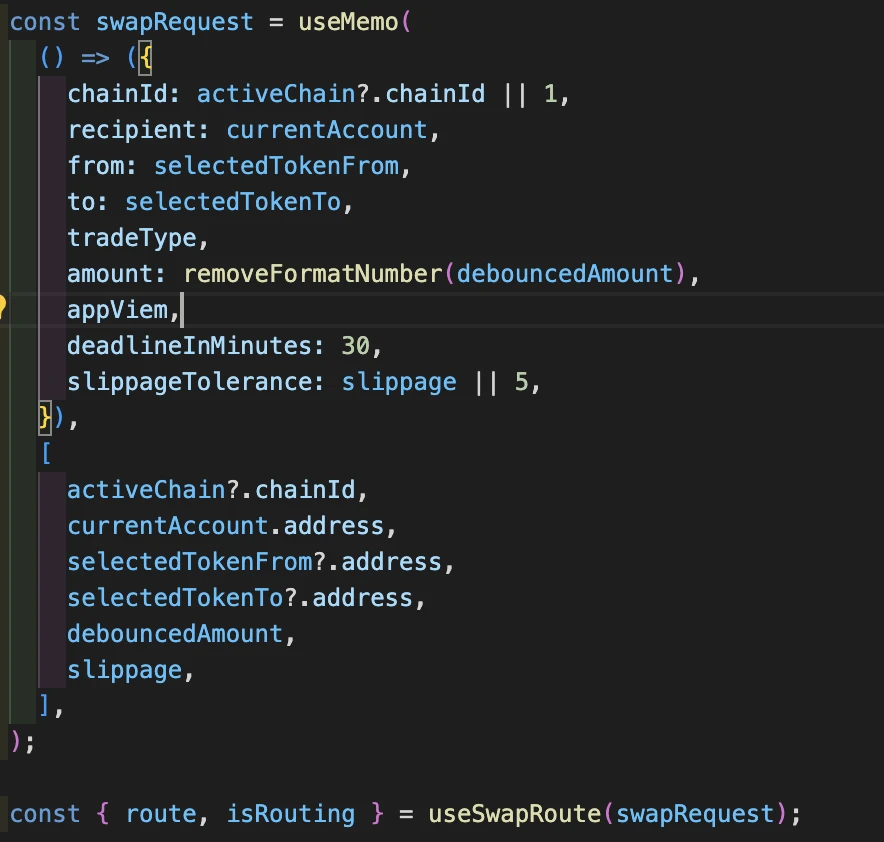
5. Swap token
Use useSwapRoute hook to retrieve the swap value
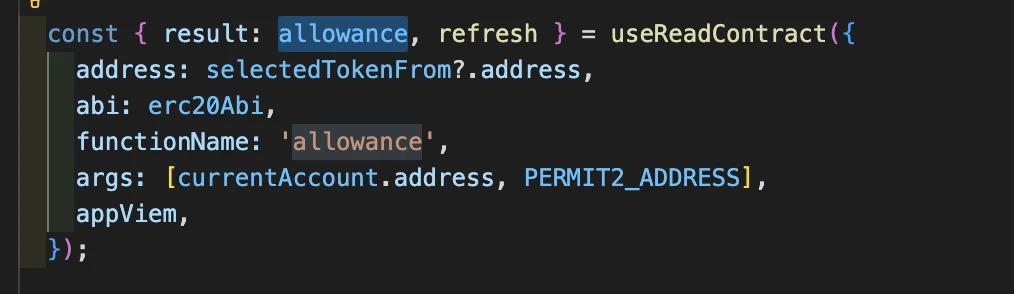
Use the useReadContract hook to retrieve the amount that has been allowed on the chain. Then, we use this to check; if the current amount is greater than the allowed amount, we need to approve it before swapping
Similarly to send activity, we also use the useEstimateFee hook to calculate the estimate Fee
Use sendRawTransaction function to send a request
Use waitForTransactionReceipt function to receive the transaction and save it to the history
6. Add Chain
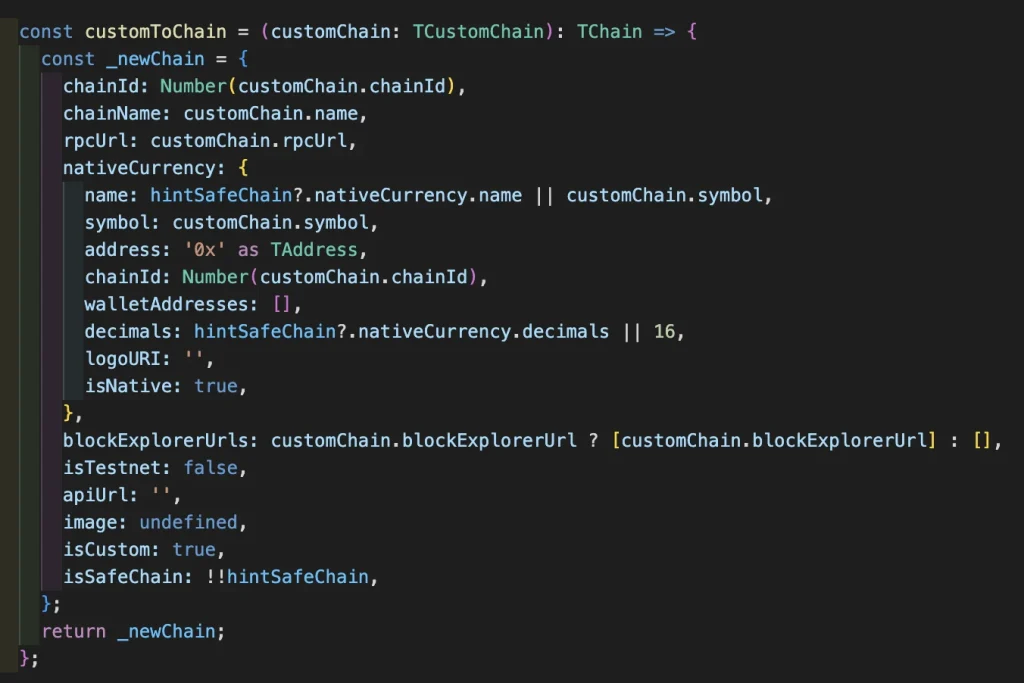
Convert the input fields of the add chain form into a request to create a chain
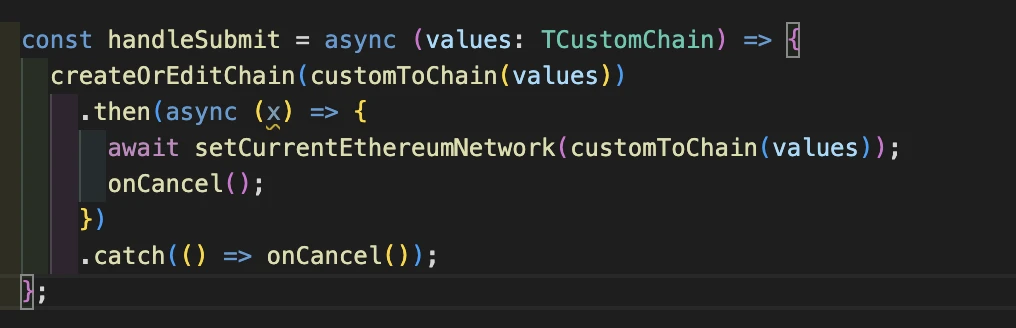
Create a new chain and save it in the storage
That’s all the steps for building a Chrome extension with main features of a crypto wallet and I hope they are useful to you. In case, you want to build a crypto wallet for your own, let’s have a look at our Blockchain Development Service and contact us for the quotation.