Dynamic Links are powerful features that enable apps to create and manage links, they work seamlessly across different platforms and contexts. On the other hand, Branch.io is a platform for managing these links, offering extensive capabilities for both tracking and user engagement. Therefore, integrating Dynamic Links to Branch.io with Flutter applications can enhance user acquisition, improve retention, and streamline user experiences. This article will provide a complete guide to integrate dynamic link using Branch.io in a Flutter project.
Dynamic link overview
What are dynamic links?
Why should we use dynamic links in a Flutter app?
There are many advantages when we use dynamic links in a mobile app, below are some outstanding benefits.
- Improved user experience: Dynamic Links enhance user experience by taking users directly to the content they are interested in, rather than just landing on the app’s home screen.
- Enhanced marketing and retargeting: Dynamic Links can be used across multiple marketing channels—like emails, social media, and ads—allowing you to track the performance of each link and see which campaigns are most effective.
- Cross-platform compatibility: Dynamic Links work seamlessly across different platforms and devices. This means a single link can open the app on both iOS and Android devices or redirect to a web version if the app is not installed.
- Enhanced user acquisition: Dynamic Links can drive user acquisition by directing users to specific content or promotional offers, which may lead to higher conversion rates.
- Improved retention: Offering users personalized and relevant content through Dynamic Links can improve user retention and engagement.
Why should we use Branch.io?
Branch.io helps mobile apps grow by using deep links that drive referral programs, sharing features, and invites, all while providing detailed attribution and analytics. It helps add ads into the app to open other apps quickly. It also supports both Android and iOS platforms, ensuring compatibility across devices.
- For Android – Requires Branch SDK version 5.12.0 or above (see Android Version History)
- For iOS – Requires Branch SDK version 3.6.0 or above (see iOS Version History)
Working environment set up
- Flutter – Dart SDK

- Java SDK

- Android
- Xcode
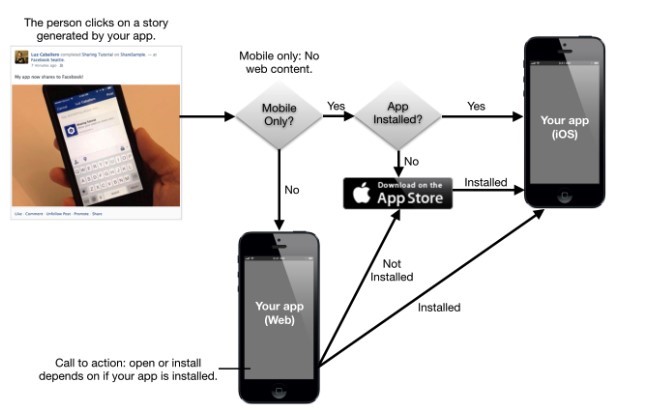
Workflow of dynamic links
- Branch.io enables users to launch the app through a link with the following setup.
- Users can easily create short links and embed data within the link.
Document review
- There is a fee for using the app, so please ensure you have a credit card prepared for payment. You can find more information here.
| Pricing tier | Details |
|---|---|
| Enterprise | The Enterprise platform is ideal for both advanced mobile adopters with complex technology stacks and traditional enterprises looking to accelerate mobile presence. |
| Self-Serve | The Self-Serve platform is completely free for users with up to 10K monthly active users (MAU). $5/mo for each 1K MAU over 10K. Linking and Universal Ads are free under 10K MAU and will require a credit card on file. |
- Configure Branch dashboard by registering your Flutter app and completing the basic set up following Branch.io document (for IOS and Android)
Screen flows (Branch.io) of Flutter dynamic links
Config dashboard account (testing is unavailable without payment)
- After registering the app and completing payment (a temporary $1 charge to your card, which will be refunded automatically).
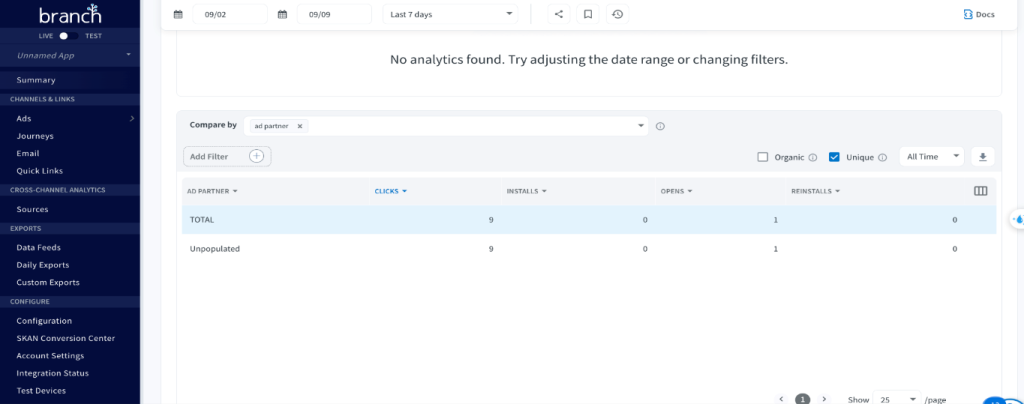
- We have 2 modes: Live and Test
- User can add more apps in this account
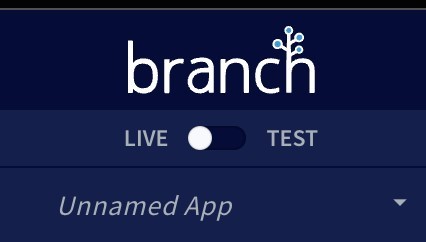
Configure dashboard for android and native file in Flutter project
Android
Configure branch dashboard
- Starting with setting up the Branch Dashboard for your application.
- Configure the default link settings for your app within the Configuration page of the Branch Dashboard.
Ensure that both the “I have an Android App” and “Enable App Links” options are checked. Fill in the values for “Android URI Scheme” and “Custom URL” specific to your app.
Also enter your SHA256 Cert Fingerprint, ensuring all characters are in uppercase.
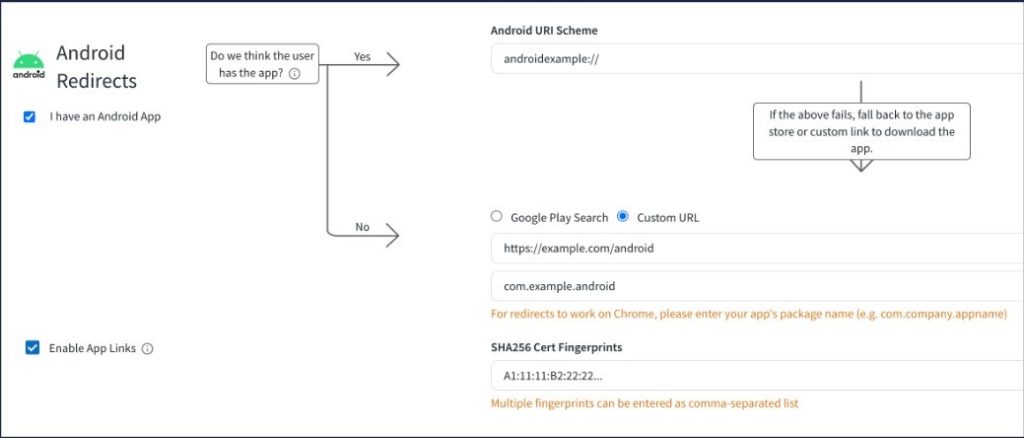
Note:
Default URL: https://0abc13.test-app.link
Android URI Scheme: deeplink://
Package Name: com.example.android
SHA256 Cert Fingerprints: You can retrieve it from the gradle section in android studio.
Configure android native file
- To configure your app to use the Branch Android SDK, you will need to update your AndroidManifest.xml file.
- Before filling in the correct values, make sure to collect the following details:
- App package name
- Android URI scheme
- The app.link domain associated with your app
- The -alternate.app.link domain associated with your app
Branch Live Key - Branch Test Key
- You can locate these values for your app in your Branch Dashboard through App Settings and Link Settings.
Refer to the sample code below for your AndroidManifest.xml file, and be sure to substitute any values labeled with a “REPLACE” comment.
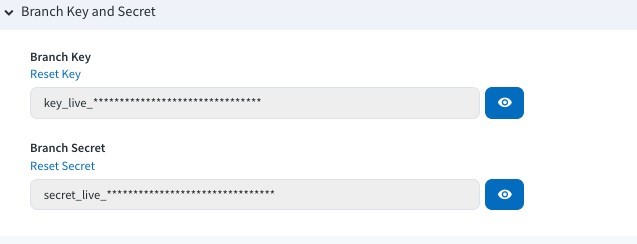
- Configure file AndroidManifest.xml with these following snippets and replace the values
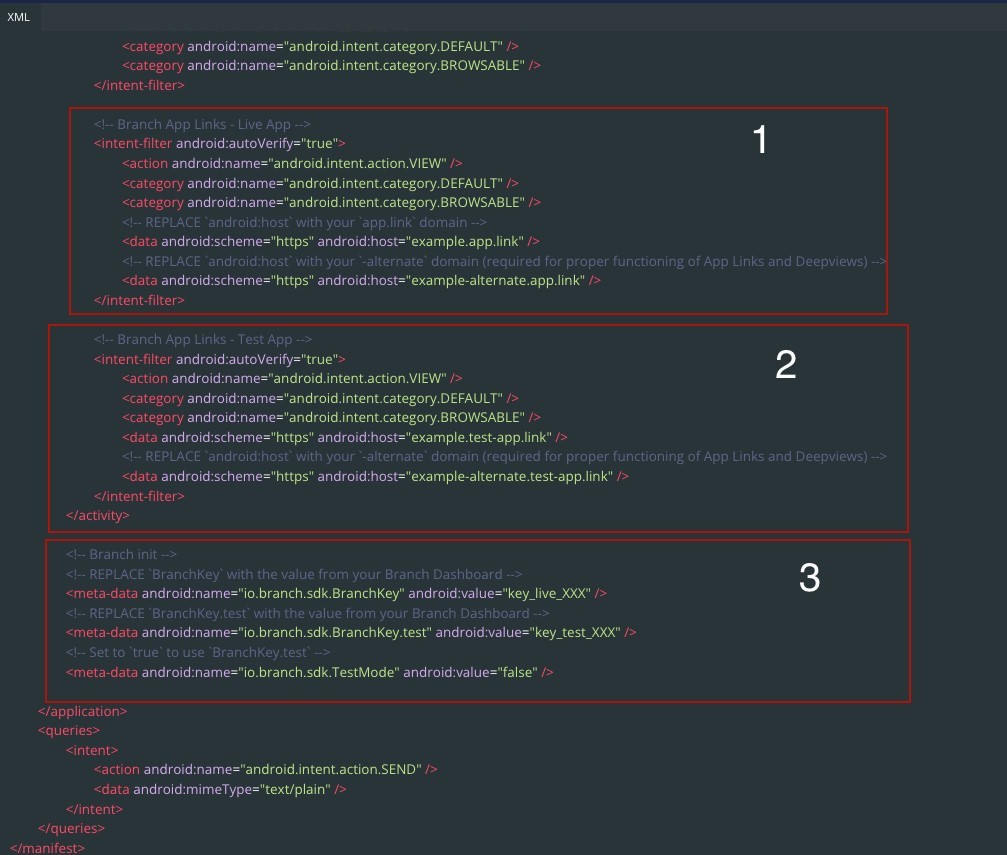
IOS
Configure branch dashboard
Start by configuring the Branch Dashboard for your application.
- Configure the default link settings for your app within the Configuration page of the Branch Dashboard.
- On the same page, make sure the “I have an iOS App” option is selected

- Retrieve your Team ID from your Apple Developer Account
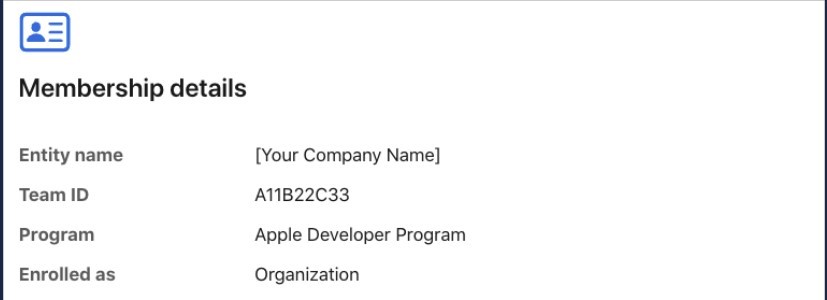
- Go back to the Configuration page and enter your Team ID as the value for your Apple App Prefix in the Branch Dashboard.

a. Config bundle identifier
- Next, make sure the “Apple Bundle ID” for your project matches the one in the Branch Dashboard.
- Find the bundle identifier for the relevant target associated with your project within Xcode, under the “Signing & Capabilities” tab.

- Return to the Configuration page in Branch Dashboard, and click the “Add New Bundle ID” button in order to add your Bundle ID.
b. Configure Associated Domains
- You also specify the link domains that your project can expect Branch to use.
- In your Branch Dashboard, navigate to the “Link Domain” section on the Configuration page.
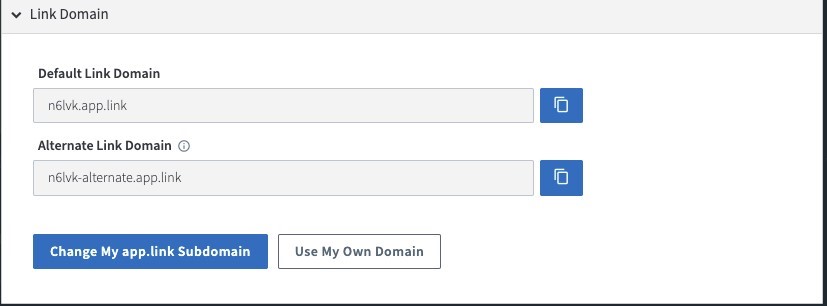
- Return to the “Signing & Capabilities” tab in Xcode, and add the domains from your Branch Dashboard to your project’s target.
- Use the format applinks:subdomain.app.link.
- The -alternate flag is required to ensure that Universal Links and Deepviews work properly for users if the app is not installed.
- The .test flag is needed if you intend to use a test key.

Note (*): If you use a custom link domain, you will need to include your old link domain, your -alternate link domain, and your new link domain in your project.
c. Configure Info.plist
- Branch requires certain key/value pairs to present in your project’s info.plist file, including:
- The branch_universal_link_domains key, which refers to your associated domains.
- The branch_key, where you can input your live key and optionally include your test key.
- The URL type key, where you add values for your URL Schemes and URL Identifier.
- Note: The Branch iOS SDK will pull the first URL Scheme from your list that is not fb, db, or pin. This value will be used one time to set the iOS URL Scheme in your Link Settings of the Branch Dashboard.
- There are several ways you can update your info.plist file:
- You can modify the “Custom iOS Target Properties” and “URL Types” sections within the “Info” tab for your target. When you choose “add new”, for non-default fields to these sections, Xcode will automatically generate an info.plist file for you
- Alternatively, you can edit the XML directly in the info.plist file.
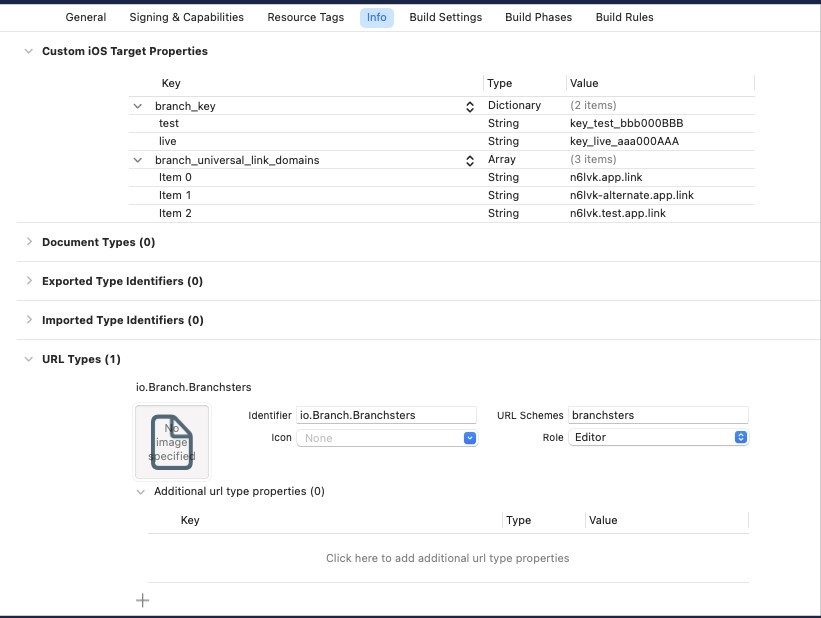
- Return to the “Signing & Capabilities” tab in Xcode, and add the domains from your Branch Dashboard to your project’s target.
- ios_url_scheme: config in dashboard branch
<key>CFBundleURLTypes</key>

<array>

<dict>

<key>CFBundleTypeRole</key>

<string>Editor</string>

<key>CFBundleURLName</key>

<string>$(PRODUCT_BUNDLE_IDENTIFIER)</string>
<key>CFBundleURLSchemes</key>

<array>

<string>${ios_url_scheme}</string>

</array>

</dict>

</array>
- Add the branch key and universal link domain
- domain: get link domain in dashboard config
<key>branch_key</key>

<dict>

<key>live</key>

<string>key_live_hqiJ9DQdvbu12jegEpNhYlbptCpyySix</string>

<key>test</key>

<string>key_test_eucM5FKaAbwZ8khntgHc0bjlzFjurQdQ</string>

</dict>

<key>branch_universal_link_domains</key>

<array>

<string>${domain}.app.link</string>

<string>${domain}-alternate.app.link</string>

<string>${domain}-alternate.test-app.link</string>

<string>${domain}.test-app.link</string>

</array>
d. Configure Pod file
- Declare the branch SDK in pod file
target 'Runner' do

use_frameworks!

use_modular_headers!

pod 'BranchSDK'

flutter_install_all_ios_pods File.dirname(File.realpath(__FILE__))

end

post_install do |installer|

installer.pods_project.targets.each do |target|

flutter_additional_ios_build_settings(target) end

end
- In the application file, declare the branch SDK to init session
Branch.getInstance().initSession(launchOptions: launchOptions) { (params, error)

in

print(params as? [String: AnyObject] ?? {})

// Access and use Branch Deep Link data here (nav to page, display content,

etc.)

}
- Outside application func, write a command to push notification when open link in web
// This function is optional to allow BranchIO to handle push notifications

func application(_ application: UIApplication, didReceiveRemoteNotification

userInfo: [AnyHashable : Any], fetchCompletionHandler completionHandler: @escaping

(UIBackgroundFetchResult) -> Void) {

Branch.getInstance().handlePushNotification(userInfo)

}
- Create an empty file named branch.json in Runner iOS
- Paste the snippet below into your file or download it from the link provided: branch.json
branch.json

{

"useTestInstance": false

}
f. Validate Integration
- After setting up your Branch iOS SDK integration, it’s crucial to validate it to ensure that data is flowing smoothly to the Branch Dashboard. This will enable you to start configuring Branch Deep Links and sending Branch Events.
- To check the status of your Branch iOS SDK, we have 4 methods:
- The Integration Status tab in the Branch Dashboard.
- Integrate the Branch iOS SDK using Integration Validation method.
- Integrate the Branch iOS SDK using Enable Logging method.
- Branch’s Link Debugger tool, which helps you confirm Branch Deep Link configuration, data, and routing.s
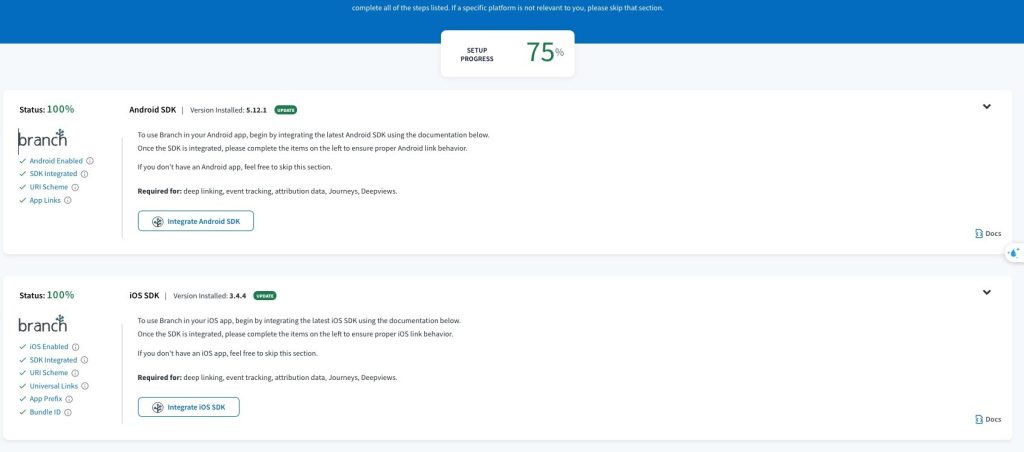
- Make sure to complete the setup for both Android and iOS platforms, achieving a status of 100% on the dashboard.
Generate dynamic links by Flutter and init link in Flutter code
Document setup
Step 1: Configure Branch Dashboard
- Login to your Branch Dashboard account
- Navigate to the Branch Dashboard
Step 2: Ensure you select the correct platform (iOS or Android) for your app:
Step 3: Configure Platform Project
For Android Integration
- Configure the necessary settings
Note: You don’t need to complete the Branch Android SDK installation manually; the plugin handles this automatically.
For iOS Integration
- To configure other settings, you might follow only these steps:
Note: You don’t need to complete the Branch iOS SDK installation manually; the plugin handles this automatically.
How to set up a library for Flutter dynamic links?
- To use the plugin, add flutter_branch_sdk as a dependency in your pubspec.yaml file.
- You can initialize it in the main function or at any point during runtime

- The next step is to test the Branch integration, which can be initiated from the main function or at any point when the app starts to retrieve information

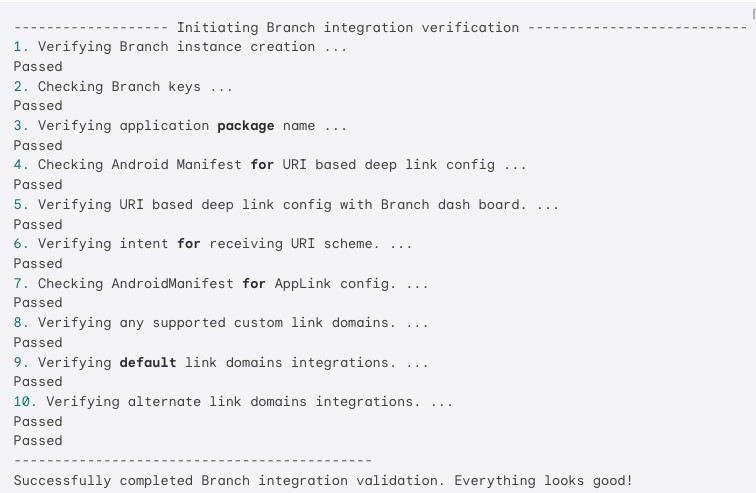
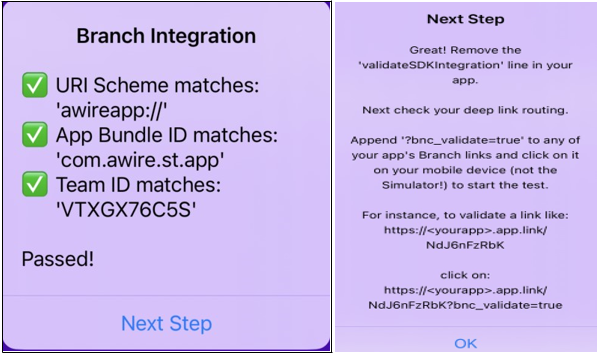
- Ensure that when the app starts, it passes all verifications and logs the results in the Flutter debug console
- Android Debug log
- iOS Debug log
How to listen for Flutter dynamic links
- To track clicks on the deep link and retrieve the associated data, you need to include the code below
- Depending on your data, configure the settings used during link generation to manage the next steps after successfully reading the link
- The addListener function should be invoked from the main function or whenever the app is opened

How to create links in Flutter app
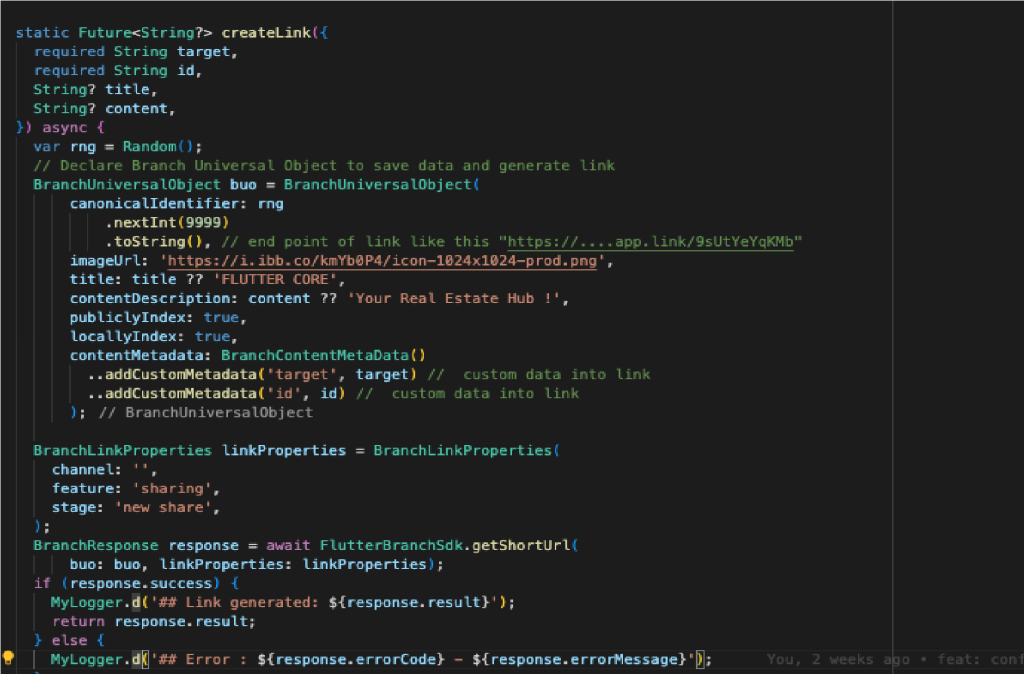
- The Branch Universal Object encapsulates the items you want to share.
- It creates a deep link within your application
How to create links by API
- Post API:

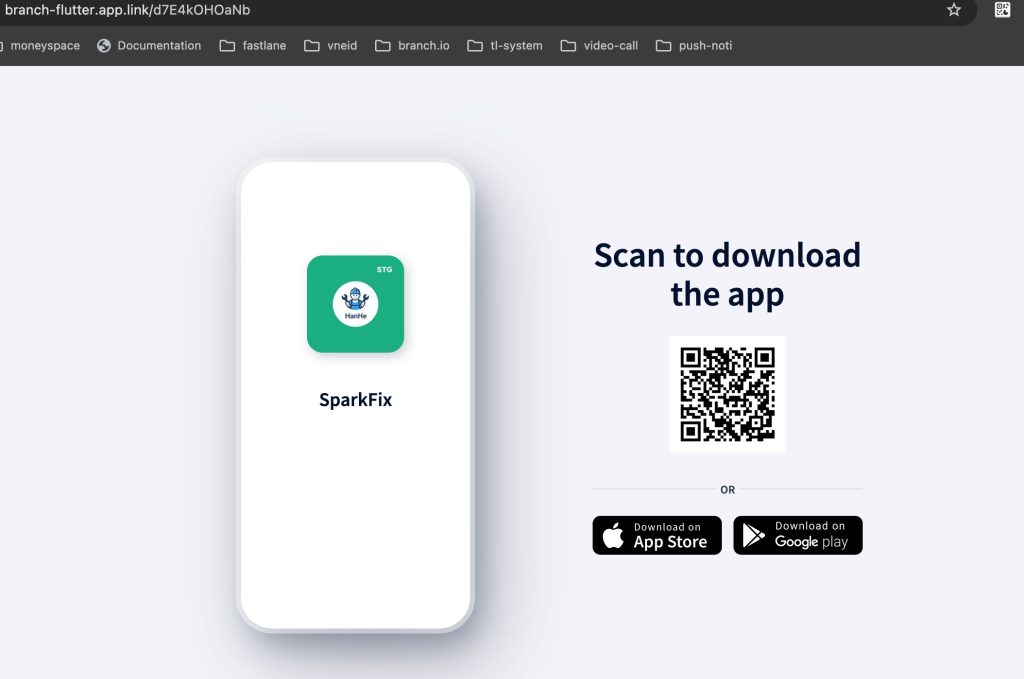
Result links
- Open your desktop
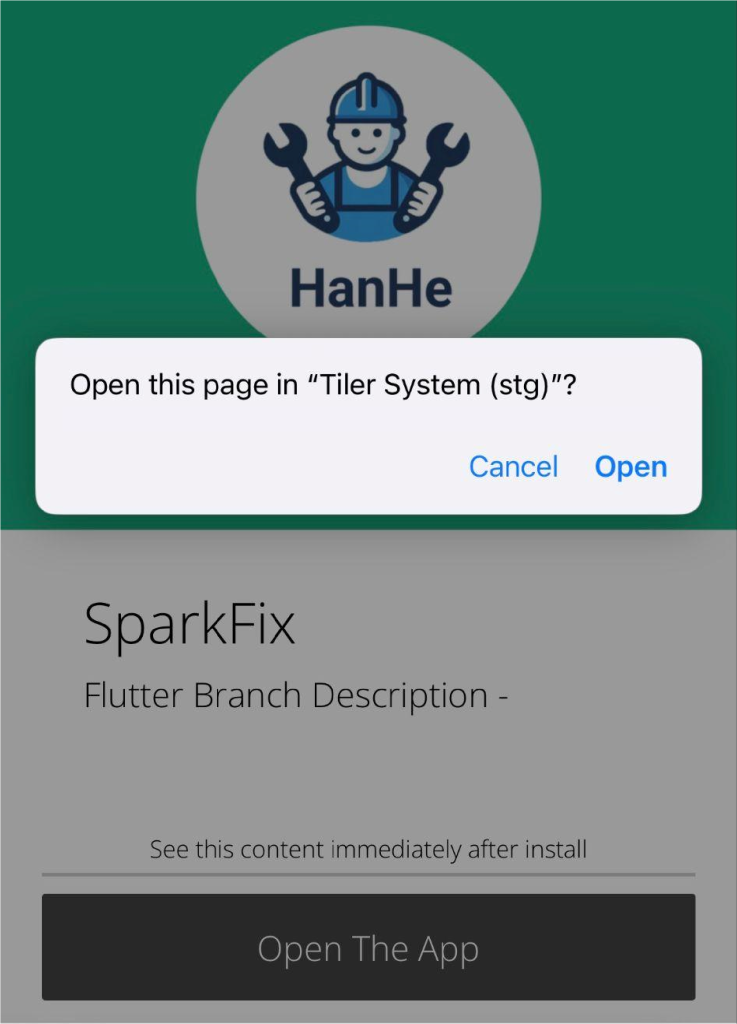
- Open the mobile app
In conclusion, integrating Branch.io Dynamic Links with Flutter applications offers a robust solution for managing deep linking and user engagement. The integration process includes setting up Branch.io, configuring the Flutter plugin, and implementing link management within the app. By leveraging Branch.io’s features, developers can enhance user acquisition, improve retention rate, and obtain valuable insights into user behavior.


